
Introduction to Easy Refrigerator Pickled Vegetables
Making your own easy refrigerator pickled vegetables is not just a fun kitchen project; it’s an excellent way to elevate your meals and boost your health. By pickling at home, you can control the ingredients, adjust flavors to your liking, and experiment with different vegetables. Did you know that homemade pickles often have fewer preservatives than store-bought ones? This simple method allows you to enjoy the tangy, crunchy goodness while knowing exactly what’s in your jar.
One of the best things about pickling is the flexibility it offers. You can use almost any vegetable you have on hand, from cauliflower to carrots, or even leafy greens like kale. Health experts often highlight the benefits of consuming fermented foods, which can support gut health and provide essential probiotics. Plus, pickling is a fantastic way to reduce food waste—those odds and ends in your fridge can become vibrant additions to your meals!
Ready to get started? Grab your favorite vegetables and the ingredients from the brine, and let’s dive into the delightfully tangy world of refrigerator pickles. For more inspiration, check out this guide on pickling vegetables at home.

Ingredients for Easy Refrigerator Pickled Vegetables
Creating your own easy refrigerator pickled vegetables is a fun and rewarding project! Here’s a breakdown of what you’ll need to get started.
Vegetables You Can Use
The beauty of pickling lies in the flexibility of your vegetable choices. Here are some favorites to consider:
- Cauliflower florets
- Green beans
- Carrots
- Pickling cucumbers
- Red bell pepper
- Sweet onions
Feel free to mix and match based on what you have available! If you're in the mood for something spicy, toss in some sliced jalapeños or Serranos. You can also adapt the mix according to the season—think crunchy summer veggies or hearty fall varieties.
Herbs and Spices for Flavor
Flavor is key in pickling! Here’s what you'll need to elevate your refrigerator pickles:
- Fresh dill (or dried, if you prefer)
- Celery seeds
- Coriander seeds
- Mustard seeds
- Black peppercorns
These herbs and spices create a deliciously aromatic experience that will have your taste buds dancing!
Ingredients for the Brine
The brine is where the magic happens! You'll need:
- Water
- Whole garlic cloves
- Distilled white vinegar
- Granulated sugar (optional for sweetness)
- Kosher salt
This simple brine is both tangy and flavorful and acts as the perfect preservation method for your veggies. As you mix everything together, remember, the brine can be adjusted to suit your taste, so don’t hesitate to experiment!
Step-by-Step Preparation of Easy Refrigerator Pickled Vegetables
Creating easy refrigerator pickled vegetables not only offers a way to enjoy fresh produce but also adds pizzazz to your meals. With just a little prep and a handful of ingredients, you can infuse vibrant flavors into your favorite veggies. Let’s dive into each step together!
Prep the Vegetables
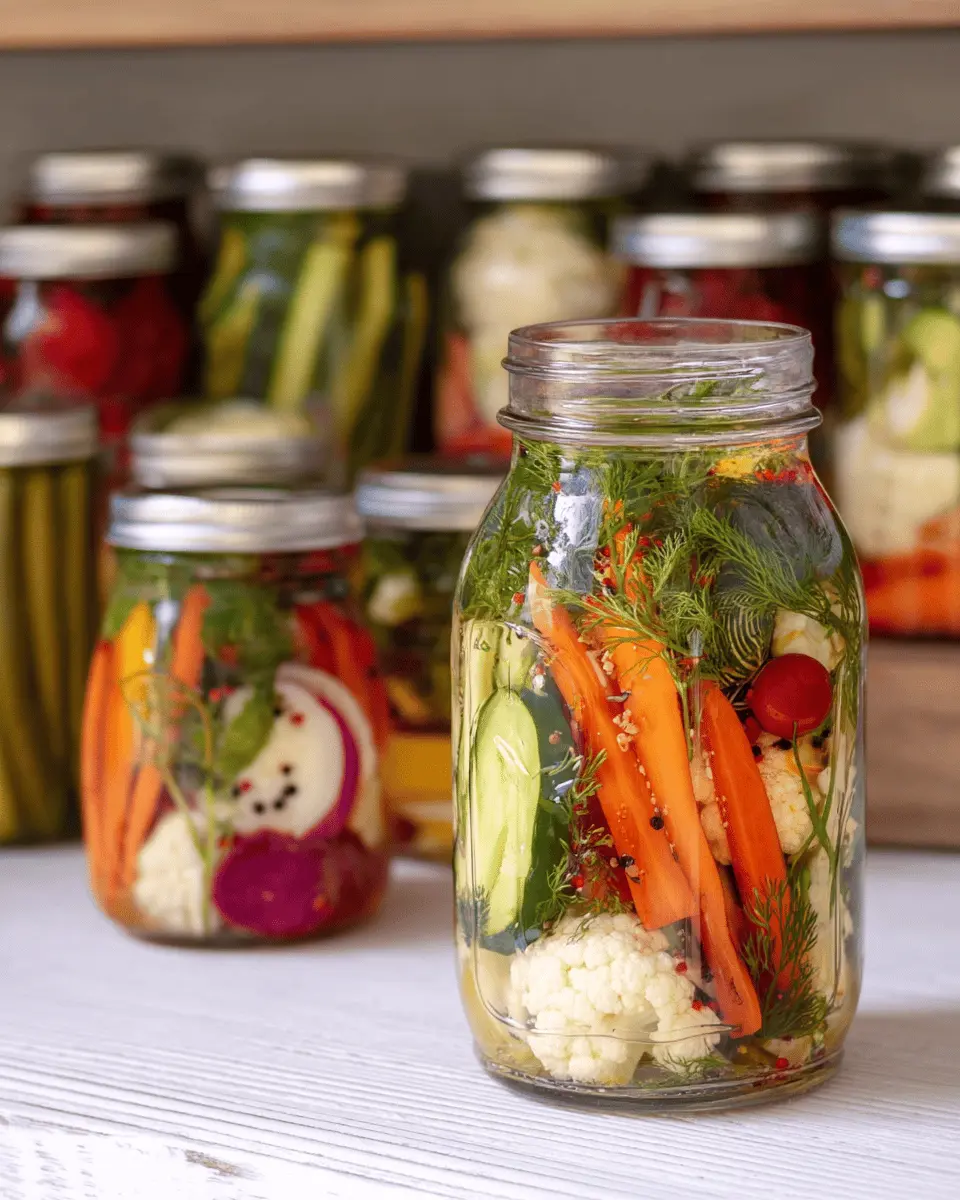
Start by gathering your chosen vegetables. A mixture of cauliflower florets, crisp green beans, crunchy carrots, pickling cucumbers, red bell pepper, and sweet onions works beautifully.
- Cut and Clean: Cut cauliflower into bite-size pieces, slice carrots into thick rounds or sticks, and leave green beans whole after trimming the ends. For cucumbers, remove the blossom end (this is key to keeping your pickles crisp) and slice them thickly. Onions should be peeled and cut into either rings or half moons, and bell peppers can be sliced into strips after seeding.
Remember, the beauty of pickled vegetables is in the variety, so feel free to mix and match based on what’s in season or what you have on hand. For more insights on seasonal vegetables, check out this guide by the USDA.
Pack the Jars with Veggies and Spices
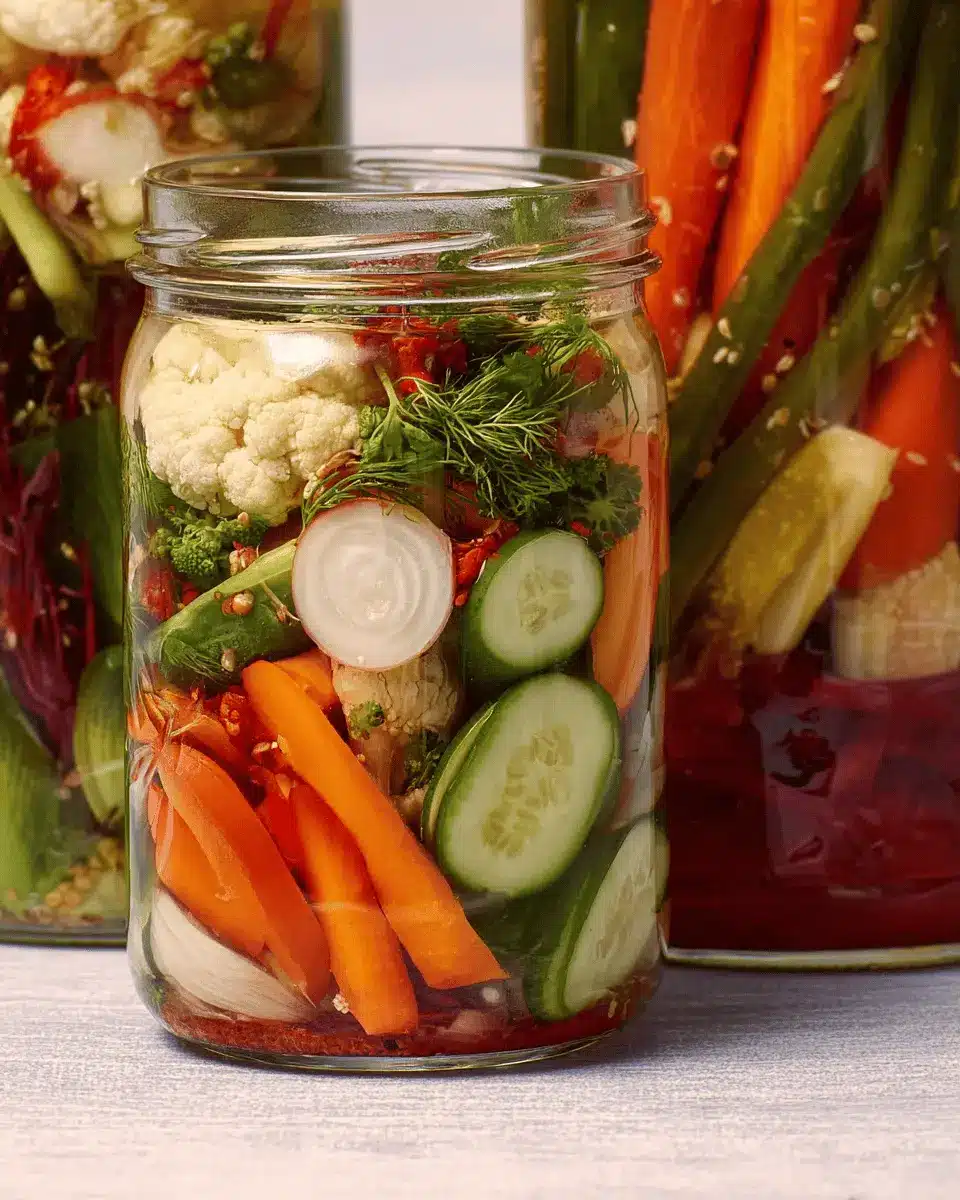
Next, it’s time to pack your jars! Grab two clean quart-sized canning jars and begin layering in your vegetables.
-
Layer It Up: Start with a few sprigs of fresh dill (or a teaspoon of dried dill if that’s what you have). Then, fill each jar with your prepared veggies. For those who enjoy a kick, consider adding a whole hot pepper—just make a slit down the side to let that heat seep in.
-
Add Spices: Don’t forget to sprinkle the seeds and peppercorns—about half a teaspoon each—into the jars as you go.
Make the Brine
Now comes the magical part: the brine.
-
Combine and Cook: In a medium saucepan, bring 4 cups of water to a boil. Reduce the heat to a simmer and add 8 cloves of whole garlic (this softens the sharp flavor). After simmering for five minutes, stir in 2 cups of distilled white vinegar, ¼ cup of sugar, and 2 tablespoons of kosher salt.
-
Boil Again: Return to a boil and stir just until the sugar and salt fully dissolve.
Combine Garlic and Brine with Veggies
We’re almost there!
-
Distribute the Garlic: Carefully remove the garlic from the brine and add four cloves to each jar of vegetables.
-
Pour the Brine: Using a cup-sized measuring cup with a spout or a ladle, fill each jar with the hot brine, making sure to cover the veggies completely.
Cool and Refrigerate
The final step is easy as pie.
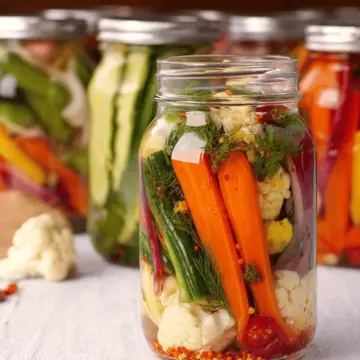
- Let It Chill: Allow the jars to cool to room temperature, then seal them with lids and pop them in the refrigerator.
Your easy refrigerator pickled vegetables will be ready to enjoy after just a day, but trust me—waiting a couple of days will enhance those delicious flavors even more. Enjoy them as a crunchy snack, a side dish, or even tossed into salads!
Happy pickling!
Variations on Easy Refrigerator Pickled Vegetables
Adding Different Spices
When it comes to your easy refrigerator pickled vegetables, feel free to personalize the flavor profile by experimenting with spices. Consider adding a pinch of turmeric for a vibrant yellow hue or some crushed garlic for an extra kick. You could even try a sprinkle of smoked paprika to introduce a subtle smokiness. Don’t hesitate to explore different spice blends like cumin or dill seed, depending on your taste preferences. Remember, the right spice can make your pickled concoction uniquely yours—just like how you might customize your favorite tacos!
Experimenting with Various Vegetables
The beauty of easy refrigerator pickled vegetables is the freedom to mix and match! Don’t limit yourself to the traditional vegetables mentioned in the recipe. Think outside the box and try radishes for a crunchy bite, beets for a sweet, earthy flavor, or zucchini for a fresh twist. Every vegetable contributes a distinct taste and texture, so experiment to find your personal favorite combinations. As you transform your veggie drawer into a pickling paradise, you'll discover endless possibilities worth savoring! Check out this article on vegetable pickling for more inspiration!
Cooking Tips and Notes for Easy Refrigerator Pickled Vegetables
How to Ensure Crisp Pickles
For perfectly crisp easy refrigerator pickled vegetables, consider a few key steps. First, choose fresh, high-quality veggies—looks and firmness matter! Removing the blossom end of cucumbers helps maintain that delightful crunch. Lastly, keep your brine hot when pouring over the veggies; this helps them stay crisp during the pickling process.
Sugar Adjustments for Personal Preference
Not a fan of overly sweet pickles? You can easily adjust the sugar in your brine! Start with just a couple of tablespoons and taste the mixture before adding more. If you prefer a tangier bite, you can even skip sugar altogether. Remember, pickling is all about personal taste, so have fun experimenting! For more tips on flavor balancing, check out reputable sites like Food52.
Serving Suggestions for Easy Refrigerator Pickled Vegetables
Serving as a Side Dish
These easy refrigerator pickled vegetables shine as a bright, tangy side dish. Serve them alongside grilled meats or hearty grain bowls for a delightful contrast. Their crunch and flavor can enhance any meal, making them a great addition to weeknight dinners or weekend barbecues.
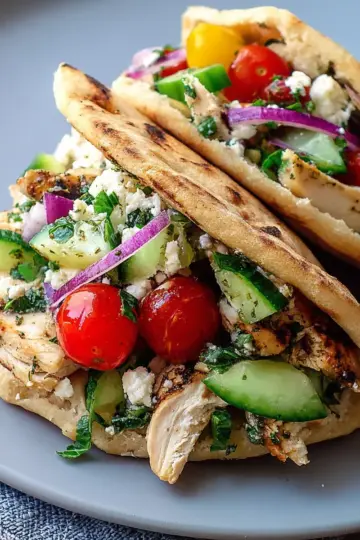
Using in Salads or Sandwiches
Elevate your salads or sandwiches with a pop of flavor from your pickled veggies. Toss them into mixed greens for an instant flavor boost or layer them into wraps and sandwiches for added texture. Imagine a turkey bacon sandwich highlighted by these zesty crunchers—they'll take your lunch to the next level!
For more creative ideas on incorporating pickled vegetables, check out this guide for inspiration.
Time Breakdown for Easy Refrigerator Pickled Vegetables
Preparation Time
Getting your veggies ready only takes about 15 minutes. Just chop, slice, and prep your favorite vegetables to set the stage for delicious pickling!
Brining Time
After preparing, the brine takes around 10 minutes to simmer and incorporate all those flavors, ensuring your easy refrigerator pickled vegetables will be bursting with taste.
Total Time
In total, you are looking at about 25 minutes to get everything prepped and ready. Just remember, the flavors will deepen as they chill in your fridge, so patience is key!
If you're new to pickling or looking for tips, consider checking out resources from The Old Farmer’s Almanac or Serious Eats for more insights and ideas. Happy pickling!
Nutritional Facts for Easy Refrigerator Pickled Vegetables
Calories per serving
Each serving of these easy refrigerator pickled vegetables generally contains about 40 calories. A delightful way to enjoy a crunchy snack or side, they are both satisfying and low in calories, making them perfect for health-conscious eaters.
Health benefits of pickled vegetables
Incorporating pickled vegetables into your diet offers several health perks. They are rich in probiotics, which can support gut health and digestion. Additionally, these tangy treats contain vitamins and minerals from the veggies, contributing to a well-rounded diet. Research shows that fermented foods can even enhance your immune system – a win-win!
Sodium content estimation
When making your easy refrigerator pickled vegetables, the estimated sodium content per serving averages around 300-400 mg due to the kosher salt in the brine. It's essential to monitor your sodium intake, especially if you're watching your blood pressure. Consider experimenting with lower sodium options or using less salt to suit your dietary needs.
For more insights on healthy eating, check out Healthline’s guide to pickled vegetables for an in-depth look at the benefits of incorporating them into your meals!
FAQs about Easy Refrigerator Pickled Vegetables
How long do pickled vegetables last?
If stored properly in the refrigerator, your easy refrigerator pickled vegetables can last for 2-3 months. They may not last that long, though! The flavors really improve over the first few days, making them even more delicious as time goes on. Just be sure to keep them sealed tightly and check for any off-smells before enjoying them.
Can I reuse the brine?
Absolutely! If there’s brine left after your veggies are gone, you can reuse it to pickle a new batch. Just keep in mind that the flavor will be less potent than the first time around. To ensure the best quality, consider straining the brine to remove any leftover bits before pouring it over fresh veggies.
What's the best type of jar to use?
For pickling, quart-size canning jars work best. They’re easy to find and can be sealed tightly to keep your easy refrigerator pickled vegetables fresh. Make sure they’re clean and sterilized for optimal results! For more tips on jar selection, you can check resources like the USDA's food preservation guidelines.
Feel free to share any more questions or pickling tips you might have! Happy pickling!
Conclusion on Easy Refrigerator Pickled Vegetables
Creating easy refrigerator pickled vegetables is a delightful way to enhance your meals and snack game. Not only are they quick to make, but they also provide crunch, flavor, and a burst of color to any dish! So, grab your favorite veggies and start experimenting—your taste buds will thank you!
For more inspiration, check out the benefits of pickling and find ways to incorporate these vibrant pickles into your daily meals!
Easy Refrigerator Pickled Vegetables
Equipment
- Quart-size canning jars
- Medium saucepan
- Glass measuring cup or ladle
Ingredients
The Vegetables
- 2 pounds combination of cauliflower florets, green beans, carrots, pickling cucumbers, red bell pepper, and sweet onions More or less as preferred.
- 1-2 jalapeño, Serrano, or red chili peppers Optional for spicy veggies.
The Herbs/Spices
- 6-8 sprigs fresh dill May substitute with 1 teaspoon dried dill.
- 1 teaspoon celery seeds
- 1 teaspoon coriander seeds
- 1 teaspoon mustard seeds
- 1 teaspoon black peppercorns
The Brine
- 4 cups water
- 8 cloves garlic Peeled and left whole.
- 2 cups distilled white vinegar 5% acidity.
- ¼ cup granulated sugar Can reduce to 2 tablespoons for less sweetness.
- 2 tablespoons kosher salt
Instructions
Preparation
- Cut the cauliflower into small, bite-size florets and slice the carrots into thick rounds or lengthwise into sticks. Trim and leave green beans whole. Remove the blossom end from cucumbers and thickly slice. Peel and slice onions into rings or half moons. Seed the bell peppers and chop or slice into strips.
- In each of 2 clean, quart-size canning jars, place a few sprigs of fresh dill, if using, then pack the jars with your desired mix of raw veggies. Add the optional hot pepper to each jar. Divide the seeds and peppercorns between the jars.
Brine Preparation
- In a medium saucepan bring the water to a boil, reduce the heat to a simmer, and add the garlic. Simmer the garlic for 5 minutes. Add the vinegar, sugar, and salt, raise the heat to return to a boil. Cook and stir until the sugar and salt dissolve and remove from heat.
- Remove the garlic from the brine and place 4 cloves in each jar. Fill each jar with the hot brine.
- Let the vegetables cool and then cover and refrigerate. The pickles will be good after one day, with flavor improving over several days. They’ll keep for 2-3 months.
Leave a Reply