
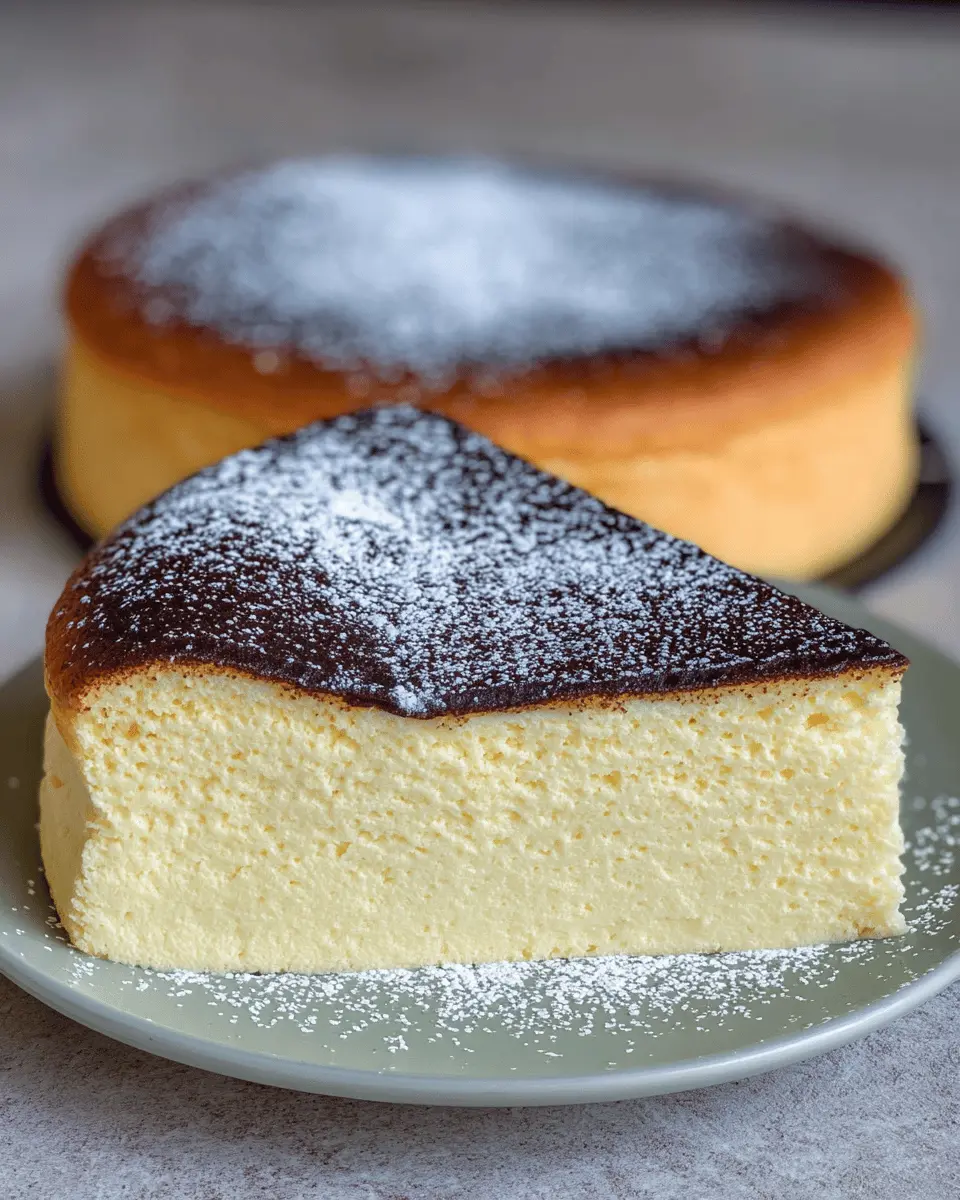
Introduction to Baked Japanese Cheesecake
Are you ready to indulge in a dessert that’s a delightful blend of fluffy lightness and rich creaminess? Enter the baked Japanese cheesecake. This delightful treat has rapidly gained popularity, enchanting dessert lovers with its airy texture and melt-in-your-mouth quality. Unlike traditional cheesecakes, this version is lighter, thanks to the incorporation of whipped egg whites, which lend a satisfying bounce to every bite.
Why is baked Japanese cheesecake so beloved?
The reasons behind its adoration are manifold. For one, it offers a unique balance of flavors—sweet yet subtle, creamy yet light. Many fans testify that the cake has an almost cloud-like quality that feels extravagant without being overly decadent. Also, its versatility makes it an excellent base for various toppings and flavor infusions, from fresh fruits to matcha powder.
As you embark on your baking journey, you'll find that the process can be as enjoyable as the final product. Plus, sharing this delightful cake with friends and family is sure to impress. So, whether you’re a baking novice or a seasoned pro, this is a delightful treat to add to your repertoire!
For more desserts that capture the essence of Japanese cuisine, check out resources like Japanese Cooking 101.

Ingredients for Baked Japanese Cheesecake
Creating a delightful baked Japanese cheesecake is all about the right ingredients. Here's what you'll need for this airy, fluffy dessert:
Egg White Meringue (Stiff Peaks)
- 5 egg whites
- ¼ teaspoon cream of tartar (or you can use vinegar or lemon juice)
- ¼ cup (50g) fine granulated sugar (avoid confectioner's sugar)
Cake Batter
- 5 egg yolks
- 8 oz cream cheese (1 block)
- ¼ cup (55g) butter
- ½ cup (125ml) milk
- ¼ cup (50g) fine granulated sugar
- 2 tablespoon (15g) cornstarch (the magic ingredient!)
- ¼ cup (34g) flour (for a gluten-free version, use rice flour or Mochiko)
- Optional flavorings: vanilla extract, lemon juice, or matcha powder
Feel free to play around with optional toppings like strawberries, honey, or a dusting of powdered sugar. For a more in-depth look at the ingredients, check out reputable baking resources to see how they impact the texture and flavor of your cheesecake! Trust me; the right components make all the difference. Are you ready to whip up a slice of this delightful dessert?
Step-by-Step Preparation of Baked Japanese Cheesecake
Creating a baked Japanese cheesecake is a delightful journey that combines simplicity with intricate flavors. Follow these detailed steps to achieve that fluffy, jiggly cheesecake that melts in your mouth.
Separate the Eggs
Start by separating the eggs. You’ll need five egg yolks and five egg whites. Take care not to let any yolk mix with the whites; this can hinder the whipping process later. Place the yolks in one bowl and the whites in a mixer bowl. Remember, fresh eggs work best for this process!
Create the Cake Batter
In a small saucepan, combine the butter, cream cheese, and ¼ cup of fine sugar. On low heat, blend these ingredients until they melt and create a smooth mixture. Once melted, remove it from the heat and gently blend in the egg yolks. After that, sprinkle in the cornstarch and flour, mixing until completely smooth. Finally, add the milk and optional flavoring—like vanilla extract—for an extra kick.
Beat the Egg Whites
Now it’s time to whip those egg whites into stiff peaks. Gradually increase the mixer speed from medium to high over a few minutes. For the best results, add cream of tartar when the foam begins to form, then drizzle in the fine sugar. Keep whipping until the egg whites are glossy and can hold firm peaks when the whisk is lifted.
Fold the Batter and Meringue
Take a small amount of the stiff egg whites and mix it into your batter; this will lighten it up. Then, gently fold the rest of the egg whites into the batter. This part is crucial—fold carefully to ensure the mixture doesn’t deflate. Over-mixing will lead to a denser cake, while under-mixing can create uneven textures in your baked Japanese cheesecake.
Prepare the Baking Pans and Preheat the Oven
Prepare your baking pans by lining them with parchment paper—this can either be one 8-inch round pan or two 6-inch pans. Next, preheat your oven to 330°F (165°C). For a bain-marie setup, place a deep baking dish filled with water in the oven.
Bake the Cheesecake
Pour your batter into the prepared pan(s). Bake in the water bath for about 25 minutes. Make sure to keep an eye on it; if your cake hasn’t risen by then, your oven temperature may need to be adjusted. After 25 minutes, crack the oven door for about 10 seconds, then lower the temperature to 245°F (around 120°C) and bake for another 45 minutes.
Cool and Flip the Cheesecake
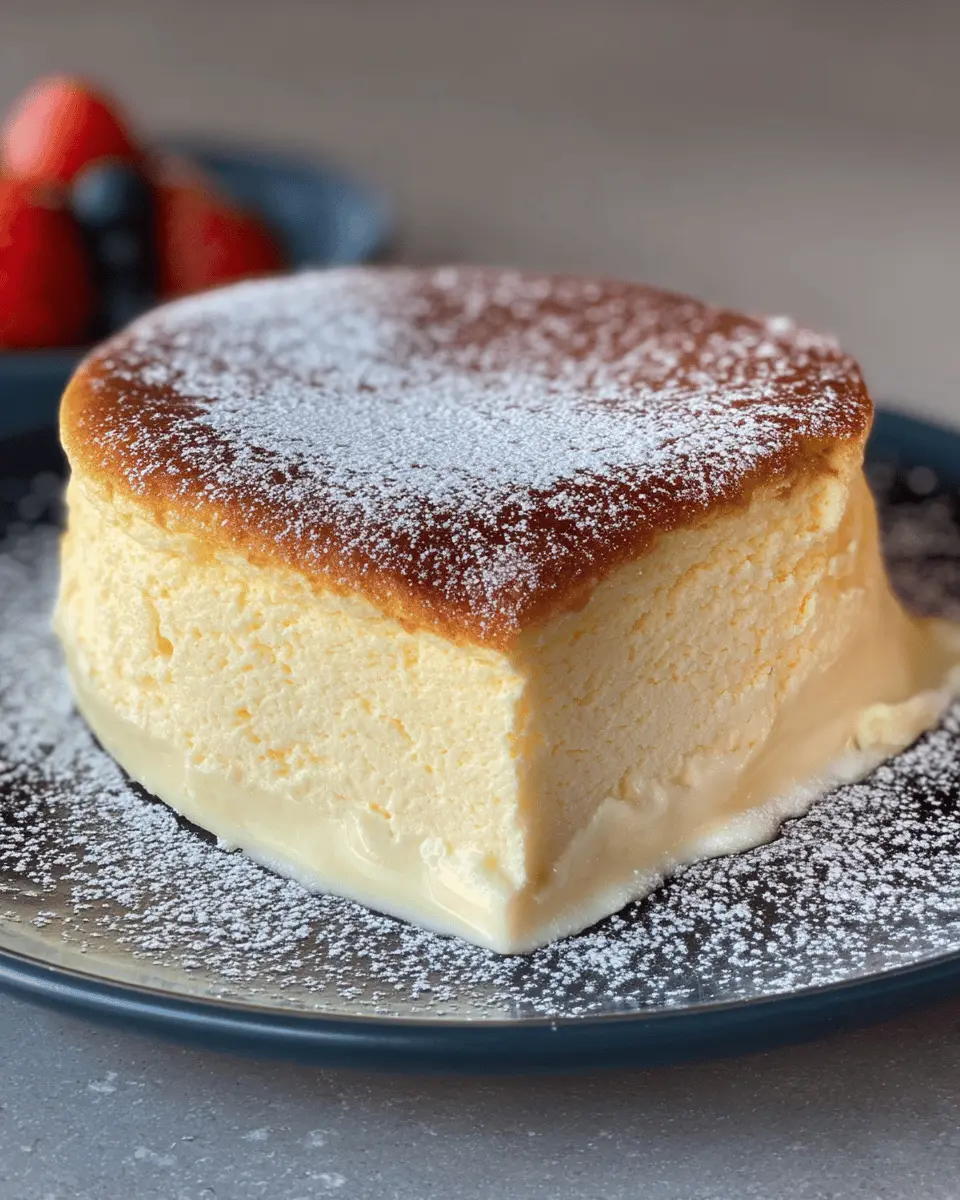
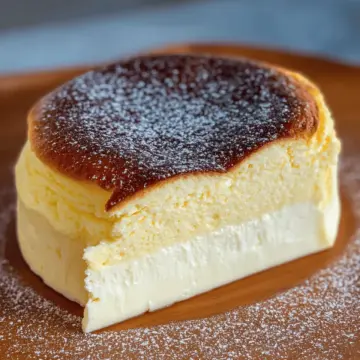
Once baked, let the cheesecake rest in the oven for around 10 minutes. Now, here comes the fun part! Invert the pan gently onto a plate covered with parchment paper. With a little patience, you’ll easily slide the cake out. Replace the bottom parchment, and flip it onto your serving plate. Serve warm or chill in the fridge for a firmer texture, but keep in mind it won’t jiggle as nicely once chilled.
Enjoy your delightful baked Japanese cheesecake! Feel free to experiment with different toppings, like strawberries or a sprinkle of matcha for that extra flair. For some additional tips on baking techniques, check out The Kitchn’s baking basics, which is an amazing resource for home bakers!
Variations on Baked Japanese Cheesecake
Baked Japanese cheesecake is a delicious canvas for many unique flavors. If you're feeling adventurous, here are two delightful variations to try.
Matcha-flavored Cheesecake
Elevate your baked Japanese cheesecake experience by incorporating matcha! Just add 2 tablespoons of matcha powder to the egg yolk batter during preparation. This will infuse the cake with that rich, earthy green tea flavor and give it a stunning color. Serve it with a drizzle of honey or alongside fresh strawberries for a visually pleasing and tasty treat.
Chocolate Baked Cheesecake
Craving something sweet? Transform your classic baked Japanese cheesecake into a chocolate lover's dream. Stir in 2 tablespoons of cocoa powder into the egg yolk batter. The creamy texture combined with the luscious chocolate flavor creates an indulgent dessert perfect for any occasion. Consider topping with whipped cream and chocolate shavings for added flair.
Feel free to explore these variations to find your own favorite twist on this beloved dessert. For more flavor ideas and techniques, check out this guide on baking tips or this resource on ingredient substitutions.
Cooking Tips and Notes for Baked Japanese Cheesecake
Making a baked Japanese cheesecake is a delightful journey into the world of soft, fluffy delights. Here are some handy tips to ensure your cheesecake turns out perfectly every time:
-
Egg Whites: When beating your egg whites, start at medium speed and gradually increase to high. This helps achieve those lovely stiff peaks without overworking them.
-
Bain-Marie Method: Baking your cheesecake with a bain-marie (water bath) ensures even cooking. It prevents the top from browning too quickly and helps achieve that creamy texture.
-
Avoid Overmixing: When you combine the egg whites into the yolk mixture, use gentle folding techniques. Overmixing can lead to a denser cake, losing that airy quality we love.
For more insights, you can check out expert tips on achieving perfect meringues at Serious Eats. Happy baking!
Serving Suggestions for Baked Japanese Cheesecake
When it comes to enjoying your baked Japanese cheesecake, the possibilities are endless! This fluffy delight shines on its own, but adding a few simple accompaniments can elevate your dessert game.
- Fresh Fruits: Top your cheesecake with seasonal fruits like strawberries, mangoes, or blueberries for a refreshing burst of flavor.
- Dusting of Sugar: A light sprinkle of confectioner’s sugar adds a sweet touch and a beautifully polished look.
- Drizzle of Honey: For a touch of natural sweetness, consider a delicate drizzle of honey or maple syrup.
- Scoop of Ice Cream: Serve with a scoop of vanilla or green tea ice cream for an indulgent combination.
- Matcha Powder: For an elegant presentation, dust some matcha powder on top for that authentic Japanese feel!
Pair these suggestions with a cup of green tea for the perfect afternoon treat! Have you tried any other toppings that you love? Share your favorites!
Time Breakdown for Baked Japanese Cheesecake
Preparation Time
15 minutes – Gather your ingredients and whip up the batter before diving into the baking magic.
Baking Time
1 hour 10 minutes – Bake the cheesecake in two stages to achieve its signature airy texture.
Total Time
1 hour 25 minutes – Just a bit over an hour, and you'll have a delightful baked Japanese cheesecake ready to impress!
This time allocation ensures you have a flavorful dessert to enjoy. If you're new to baked Japanese cheesecake, don’t worry—just follow the steps, and you'll be on your way to dessert bliss! For more guidance, consider checking out resources such as Serious Eats or Bon Appétit for tips on perfecting your baking skills. Happy baking!
Nutritional Facts for Baked Japanese Cheesecake
When delving into the world of baked Japanese cheesecake, it’s good to keep nutritional information in mind. Here’s a quick rundown of what you can expect from a typical slice:
Calories
A single slice of baked Japanese cheesecake contains around 200-250 calories, depending on portion size and ingredients. This makes it a delightful treat that won’t completely derail your diet.
Protein
Each slice offers about 6-8 grams of protein, thanks to the combination of egg yolks, cream cheese, and egg whites. This makes it a bit more filling than your average dessert!
Sugar
The sugar content in a slice is roughly 10-12 grams. While it has some sweetness, it’s less sugary than many traditional cheesecakes, giving you a more balanced dessert experience.
For further insights into calorie measures, nutritional density, or alternative dessert options, check out resources from reputed nutrition websites like the USDA National Nutrient Database or Healthline. Enjoy your baking adventure!
FAQs about Baked Japanese Cheesecake
How do I achieve the perfect texture for my cheesecake?
To get that light and fluffy texture that baked Japanese cheesecake is known for, it's all about the meringue. Make sure you beat the egg whites to stiff peaks and gently fold them into the batter. This technique helps incorporate air, giving your cheesecake a delicate rise. Be mindful not to overmix; otherwise, you'll lose that airy quality.
Can I make this cheesecake gluten-free?
Absolutely! Just swap out the all-purpose flour with sweet rice flour or Mochiko. This will keep your cheesecake just as delicious while catering to gluten-free diets. Always check for gluten-free labels on your baking ingredients to avoid any cross-contamination.
What are some recommended toppings for baked Japanese cheesecake?
There are endless delicious toppings to consider! Try fresh strawberries, a dusting of confectioners sugar, or drizzle with honey. For a twist, matcha powder can add a unique flavor profile. Feel free to get creative—fruits of your choice always elevate the presentation and taste!
For more tips and instructions, you might find these baking science concepts helpful!
Conclusion on Baked Japanese Cheesecake
Indulging in a baked Japanese cheesecake offers a delightful combination of flavors and textures that are hard to resist. Its soft, fluffy nature makes it a perfect dessert for gatherings or a special treat for yourself. This cheesecake can be enjoyed warm or chilled, each way revealing its unique charm. Don't forget to experiment with toppings for extra flair!
Baked Japanese Cheesecake
Equipment
- mixer
- Pot
- baking pan
- Parchment paper
- Bain-Marie
Ingredients
Egg White Meringue
- 5 pieces egg whites
- ¼ teaspoon cream of tartar or vinegar or lemon juice
- ¼ cup fine sugar 50g, not confectioner sugar
Cake Batter
- 5 pieces egg yolks
- 8 oz cream cheese 1 bar
- ¼ cup butter 55g
- ½ cup milk 125ml
- ¼ cup fine sugar 50g
- 2 tablespoon corn starch 15g, magic ingredient
- ¼ cup flour 34g, use rice flour or Mochiko for gluten-free
Optional Toppings
- str berries
- confectioner sugar
- fruits of your choice
- honey
- matcha powder
Instructions
Preparation
- Separate 5 beautiful eggs. Place the egg yolks in a bowl, and the egg whites in a mixer bowl.
- Place the butter, cream cheese and ¼ cup of fine sugar into a pot over low-heat. Allow the ingredients to melt, and mix together into a beautifully smooth batter mixture.
- Remove the pot from heat, and add the egg yolks into the batter mixture. Mix well, but gently.
- Add the cornstarch and flour. Once again, mix well. Clumps should disappear.
- Add milk and optionally vanilla extract or other flavors of your choice.
- Mix well. The batter should be smooth and liquid-y.
- Set aside the batter as you beat the egg whites into stiff peaks.
- Pre-heat oven to 330F. Prepare a bain-marie by putting water in a deep rectangular baking pan or dish. Place into the oven.
- Prepare baking pans— with these ingredients, you can bake one 8-inch cake or two 6-inch cakes. Line the bottoms of the baking pans with circular parchment paper, and the inside sides with rectangular strips of parchment paper.
- Once you achieve stiff peaks, place some beaten egg white into the batter and mix together.
- Repeat the above step two more times.
- Pour the batter into the rest of the egg whites and mix together using folding techniques.
- Pour the well-incorporated, but not over-mixed batter into the baking pan(s).
- Bake bain-marie style for 25 minutes at 330F.
- After 25 minutes, crack open the oven door slightly and lower the oven temperature to about 245-265F, and bake for an additional 45 minutes.
- Allow your cake to rest in the oven after baking for about 10 minutes.
- Remove from the oven. Be careful and use oven mitts as needed.
- Place a sheet of parchment paper over the cake. Place a plate over the cake and parchment paper. Flip the cake upside down.
- Remove the wet parchment paper from the cake, replace the bottom parchment paper of the cake.
- Now place another plate— the presentation or serving plate, on top of the cake. Flip the cake again, carefully.
- Serve when still warm, or chill in the fridge.
Leave a Reply