
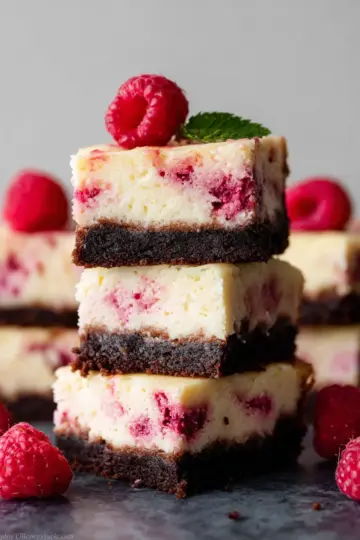
Introduction to Banana Pudding Poke Cake
If you’re on the hunt for a dessert that combines nostalgia with indulgence, look no further than banana pudding poke cake. This delightful treat takes the classic flavors of banana pudding and transforms them into a moist, cake form that will leave your taste buds singing. Perfect for gatherings or cozy nights in, this cake is not only easy to prepare but also a total crowd-pleaser.
Why is Banana Pudding Poke Cake a must-try?
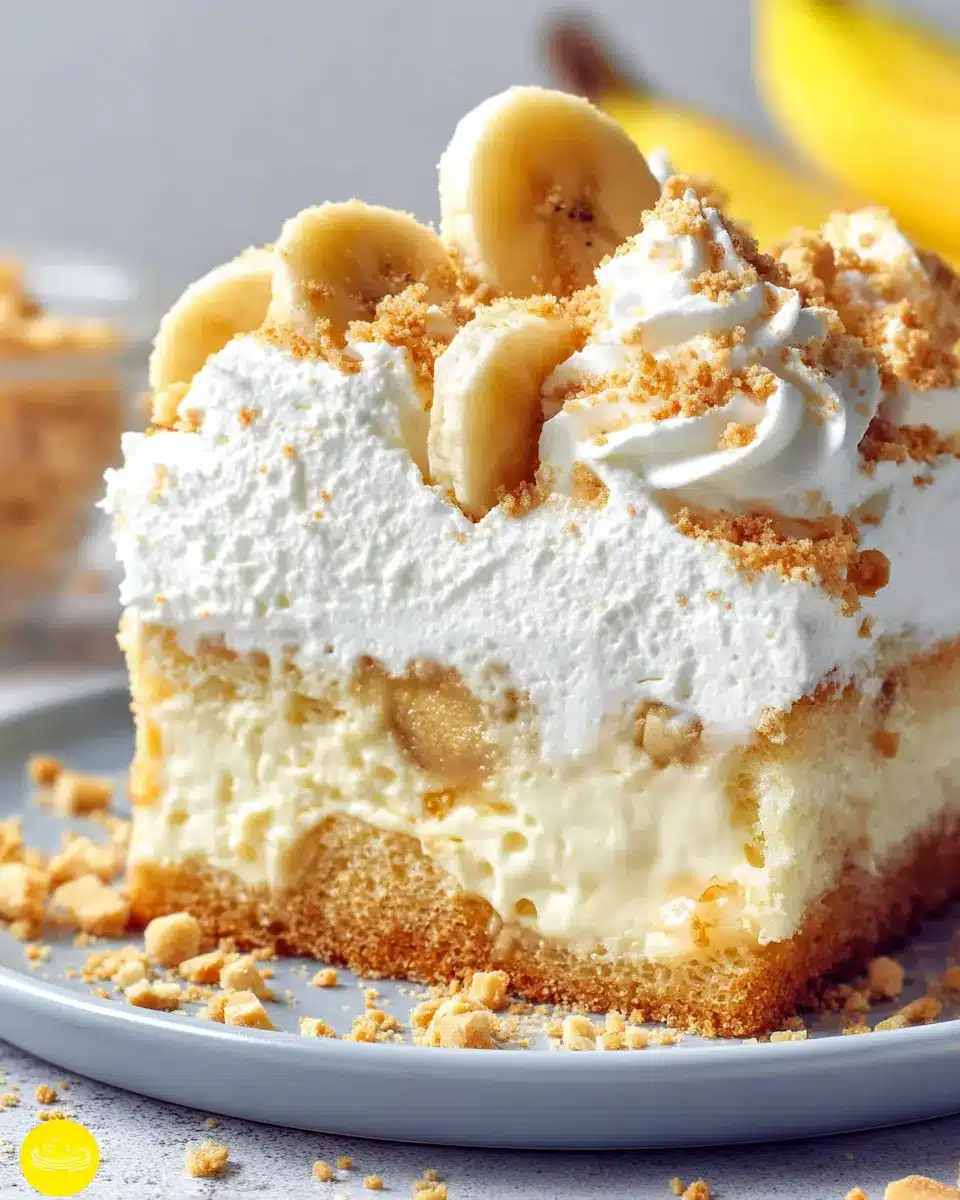
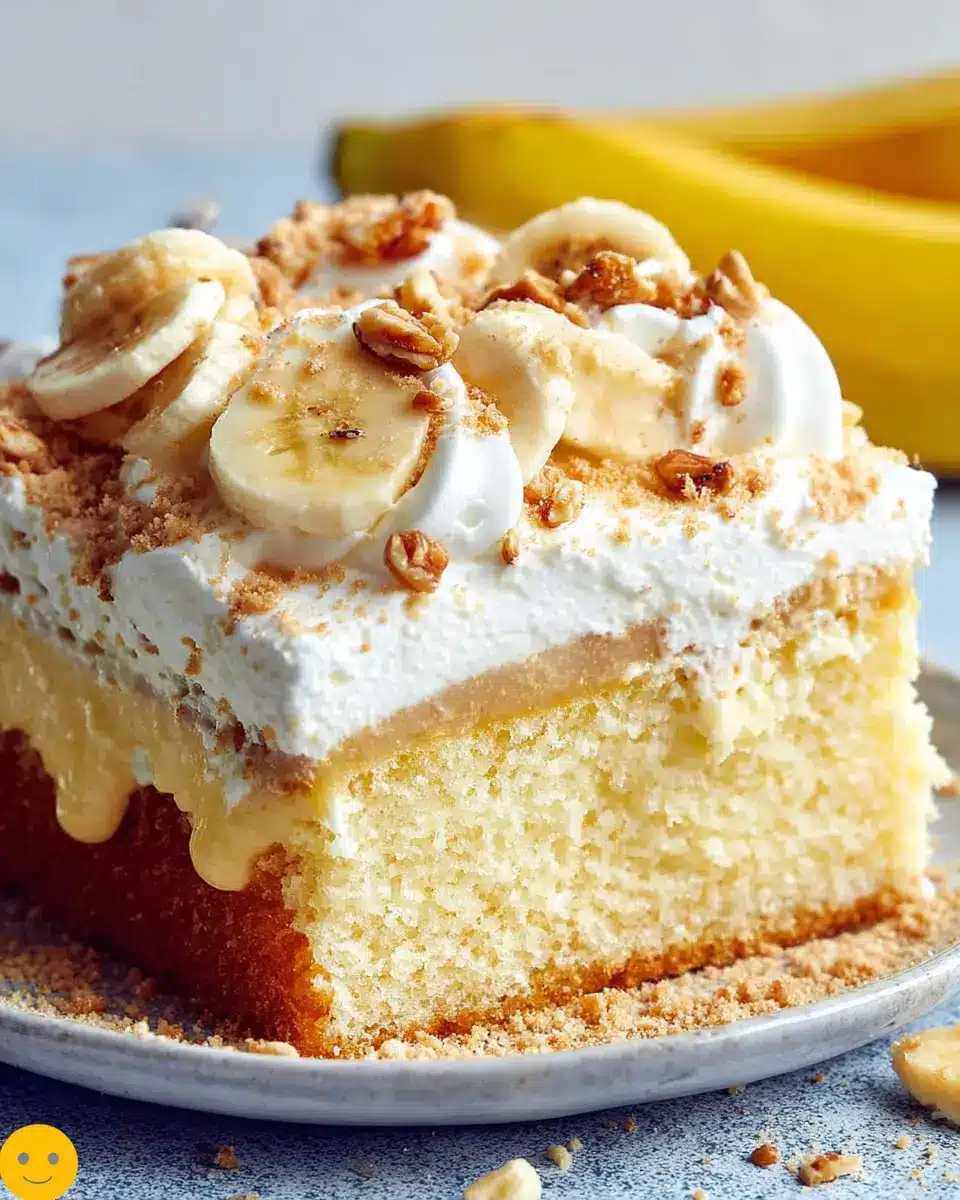
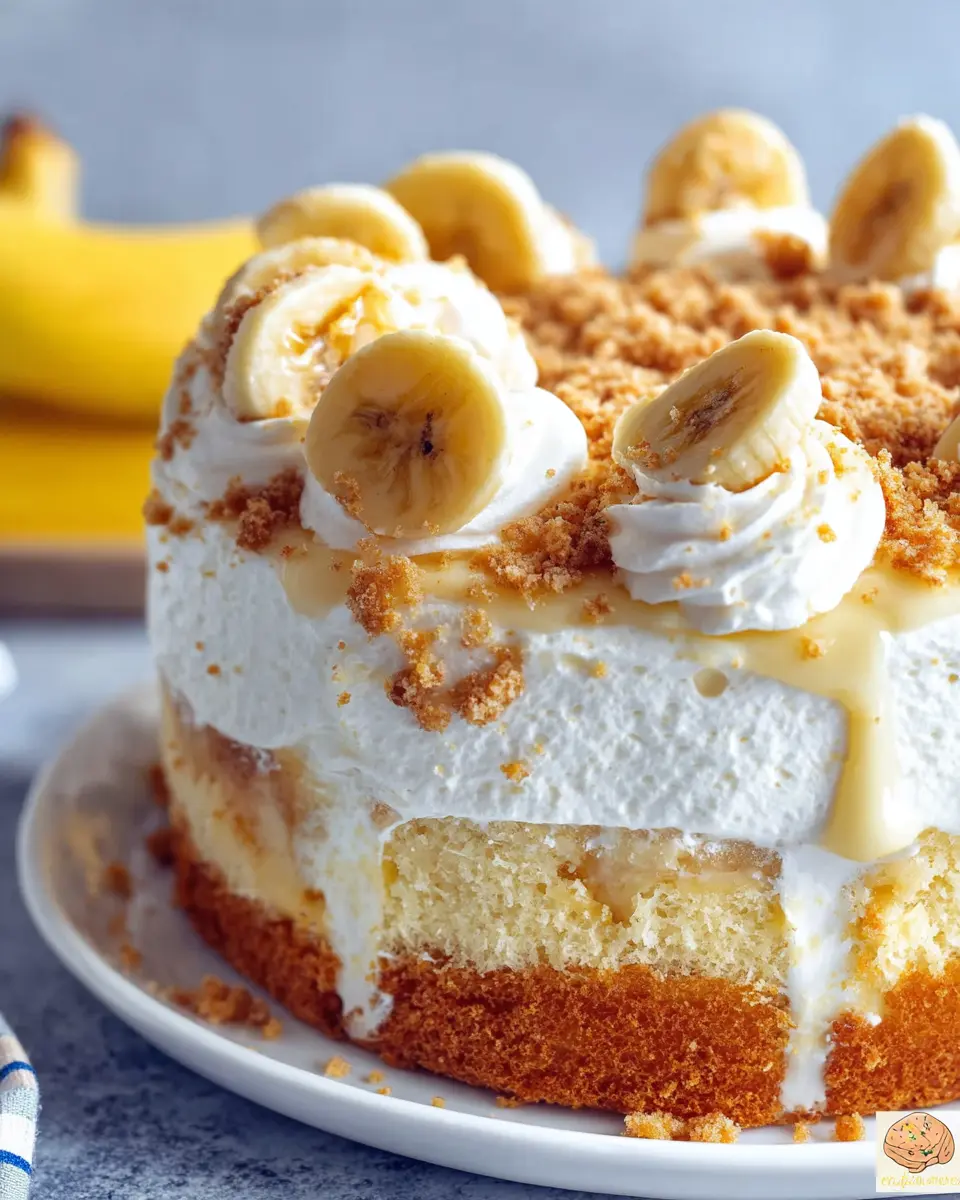
The magic of this recipe lies in its layers. After baking a simple yellow cake, you poke holes throughout its surface and pour in creamy, instant banana pudding mixed with cold milk. This process allows the pudding to seep deep into the cake, ensuring every bite is flavorful and moist. Topped off with whipped topping and a sprinkle of crushed vanilla wafers, it’s a delightful play on textures and flavors.
If you love combining ease with impressive results, this cake delivers. It stands out not just for its taste but also for its visually appealing layers. For more information on making cakes that wow, check out resources like the Food Network or Serious Eats. Whether for a birthday or just a Tuesday, this banana pudding poke cake is a delicious way to satisfy your sweet tooth.
Ingredients for Banana Pudding Poke Cake
Planning to make a delicious banana pudding poke cake? Let’s gather all the essential ingredients you’ll need to whip up this delightful dessert!
List of Ingredients Needed
- 1 box yellow cake mix – This will serve as the canvas for your delicious pudding.
- Eggs, oil, and water – Check the back of the cake mix box for the precise amounts. These will help create a moist and fluffy texture.
- 2 (3.4 ounce) packages of instant banana pudding – Instant pudding is a key player here, providing that rich banana flavor.
- 4 cups cold milk – Whole or 2% milk is best for a creamy pudding consistency; avoid skim for this recipe.
- 8-ounce tub of frozen whipped topping, thawed – Look for options like Cool Whip to achieve that luscious finish.
- 20 vanilla wafers, crushed – These add the perfect crunch that contrasts beautifully with the creamy layers.
These ingredients come together to create a banana pudding poke cake that’s sure to impress your friends and family! Happy baking!
Step-by-step Preparation of Banana Pudding Poke Cake
Prepare the cake mix
To kick off your delightful banana pudding poke cake, start by preparing a box of yellow cake mix. Follow the instructions on the box, adding the required ingredients—usually eggs, oil, and water. Mix everything together until it's smooth and well combined, ensuring no lumps remain. This step is crucial to achieving the cake’s fluffiness. If you're looking for more tips on selecting the right cake mix, consider checking out this helpful guide.
Bake and cool the cake
Once your mixture is ready, pour it into a greased 9x13-inch baking pan. Bake according to the package directions, typically around 25-30 minutes, or until a toothpick inserted in the center comes out clean. After baking, let the cake cool in the pan for about 10-15 minutes. This step is important because you want the cake to be warm but not hot; it helps the pudding seep in more effectively later.
Poke holes in the cake
Now it’s time for a little fun! Grab a wooden spoon handle and start poking holes all over the top of the cake. Make sure the holes are deep enough to reach the bottom but not so wide that the cake crumbles. This is where the magic happens! The pudding will seep into these holes, giving you that delightful flavor throughout the cake.
Whisk the banana pudding
While your cake cools, whisk together the two packages of instant banana pudding with four cups of cold milk in a mixing bowl. Stir vigorously until the mixture becomes smooth and creamy, around 2 minutes. Don’t let it sit too long after mixing; you want it pourable for the next step.
Pour pudding over the cake
Pour the freshly whisked pudding over the cake, making sure to direct it into the holes you poked. Use the back of a spoon to gently push the pudding down into the holes. This ensures each bite of your banana pudding poke cake is packed with that delicious banana flavor.
Refrigerate to set
Cover your cake with plastic wrap and pop it in the refrigerator for about 2 hours. This chilling time allows the flavors to meld and the pudding to set perfectly. It’s the hardest part of the process—waiting! Consider using this time to clean up or even experiment with other fun dessert ideas.
Add whipped topping and crushed wafers
After the chilling period, take your cake out and spread the thawed whipped topping evenly over the top. The final touch? Crushed vanilla wafers sprinkled on top. This adds that lovely crunch and enhances the classic banana pudding experience. Serve immediately and enjoy this delightful dessert; it’s perfect for gatherings or simply treating yourself!
With this simple recipe, you’ll be the star of your next potluck or dinner party! Happy baking!
Variations on Banana Pudding Poke Cake
Layered with Fresh Bananas
For an extra burst of flavor and freshness, layer your banana pudding poke cake with slices of ripe, fresh bananas right between the pudding and whipped topping. Not only does this add a delightful texture, but it also enhances the banana flavor, making the dessert even more irresistible. Just be mindful—the bananas can brown quickly, so it's best to serve the cake on the same day you make it. If you want to maintain that vibrant look, consider slicing them just before serving!
Chocolate Banana Pudding Poke Cake
Are you a chocolate lover? Then you’ll definitely want to try a chocolate twist on the classic banana pudding poke cake. Simply replace the two packages of instant banana pudding with chocolate pudding mix. This fun variation creates a rich, decadent cake that pairs beautifully with the bananas. Add a drizzle of chocolate syrup or even chocolate chips for a truly indulgent treat! For more dessert inspiration, check out this chocolate dessert guide.
Whether you stick to the traditional style or opt for these tasty variations, your banana pudding poke cake is sure to impress!
Cooking Tips and Notes for Banana Pudding Poke Cake
Best practices for poking holes
When preparing your banana pudding poke cake, ensure the holes are large enough for the pudding to seep in. Use a thin wooden spoon handle or a skewer, and poke straight down to the bottom. This technique helps the pudding evenly saturate the cake, enhancing flavor and texture. Remember, the more holes you make, the more deliciously moist your cake will be!
Storage tips for leftovers
After you've indulged in your delightful cake, store any leftovers in the refrigerator. Cover it tightly to keep it fresh for up to 3 days. If you prefer crispy vanilla wafers, consider keeping them separate and sprinkling them right before serving to maintain that perfect crunch. For even more inspiration, check out this storage guide for tips on cake preservation.
Serving Suggestions for Banana Pudding Poke Cake
Perfect pairings with your poke cake
When serving your banana pudding poke cake, consider complementing it with a few delightful accompaniments. Freshly sliced strawberries and pineapple make for a vibrant, fruity side that pairs beautifully with the cake’s creamy texture. For those who enjoy a bit of crunch, some homemade granola can add an unexpected twist. A dollop of vanilla ice cream on top can elevate that indulgent experience even further!
Presentation ideas for entertaining
Make your banana pudding poke cake the star of your dessert table! Use a decorative cake stand to add height and interest. Consider garnishing it with mint leaves or a drizzle of caramel sauce to create an eye-catching finish. For gatherings, individual servings in mason jars can give a charming, rustic vibe, and they make cleanup a breeze! These little touches can transform a simple cake into a showstopper at any event.
Let your creativity run wild and enjoy the sweet moments!
Time Breakdown for Banana Pudding Poke Cake
Preparation time: 15 minutes
Get your ingredients together and whip up the cake mix! Measure out the eggs, oil, and water to kick things off.
Baking time: 30 minutes
You’ll need about half an hour to bake that delicious yellow cake until it’s perfectly golden.
Total time: 2 hours 45 minutes
Including cooling and setting time in the refrigerator—and trust me, it’s worth the wait for this banana pudding poke cake!
If you're curious about the pudding-filled goodness that awaits you, check out this guide on perfecting poke cakes for more tips!
Nutritional Facts for Banana Pudding Poke Cake
If you’re diving into a slice of banana pudding poke cake, it’s helpful to know what you’re indulging in. Here’s a quick look at the nutritional facts:
- Calories: Each slice is packed with about 270 calories, making it a delightful treat without compromising your daily intake.
- Carbohydrates: With 46 grams of carbohydrates, this cake offers a sweet energy boost, perfect for any occasion.
- Protein and Fat Content: You’ll find 5 grams of protein and 6 grams of fat, providing a bit of balance to this otherwise decadent dessert.
For those interested in exploring more about balanced diets, you can check out resources like the USDA Nutrition Database. Understanding nutrition can truly enhance your baking adventures!
FAQs about Banana Pudding Poke Cake
Can I make it ahead of time?
Absolutely! This banana pudding poke cake is perfect for making ahead of time. In fact, letting it sit in the refrigerator for several hours, or even overnight, not only enhances the flavors but also helps the pudding soak all the deliciousness into the cake. Just be sure to add the crushed vanilla wafers right before serving to keep them crunchy.
What if I can’t find instant pudding?
No worries if you can’t find instant pudding! You can use cooked banana pudding instead, but the soaking time may require adjustments. Follow the package instructions for cooking, and allow it to cool slightly before pouring it over the poked cake.
How do I store banana pudding poke cake?
Storing your banana pudding poke cake is easy! Keep it covered in the refrigerator. It’s best enjoyed within 2-3 days, as the texture might change with time. If you’ve added fresh banana slices, keep an eye on those, as they may brown quickly. A little lemon juice can help slow that down! For more storage tips and tricks, check out this guide.
Conclusion on Banana Pudding Poke Cake
In summary, this delightful banana pudding poke cake is the perfect way to impress your friends at gatherings or simply enjoy a sweet treat at home. Easy to make and overflowing with flavor, it’s a dessert that’s sure to become a staple in your recipe collection. Enjoy!
For more sweet inspiration, check out Bakerella for creative dessert ideas.

Banana Pudding Poke Cake
Equipment
- Oven
- Mixing bowl
- whisk
- Wooden spoon
- 9x13-inch baking pan
Ingredients
- 1 box yellow cake mix
- 3 eggs As per package directions
- ⅓ cup oil As per package directions
- 1 cup water As per package directions
- 2 packages (3.4 ounce) instant banana pudding
- 4 cups cold milk Whole or 2% milk preferred
- 8 ounce frozen whipped topping, thawed Cool Whip
- 20 vanilla wafers, crushed
Instructions
- Prepare 1 box yellow cake mix with ingredients needed to make cake: eggs, oil and water according to package directions for a 9×13-inch cake.
- Once cake comes out of the oven, allow it to cool for just a couple of minutes.
- Then, with a wooden spoon handle, begin poking holes in the cake. You want the holes to be big enough so that the pudding has plenty of room to get down in there.
- In a bowl, whisk together 2 (3.4 ounce) packages instant banana pudding with 4 cups cold milk. Stir quickly until all the lumps are gone but before the mixture starts getting too thick to pour.
- Pour pudding over cake, taking care to pour it right into the holes as much as possible.
- Spread it all out and using the back of the spoon, gently push pudding down into the holes.
- Put the cake into the refrigerator to set and cool for about 2 hours.
- Once the cake has completely cooled, spread on 8 ounce tub frozen whipped topping, thawed.
- Sprinkle 20 vanilla wafers, crushed onto the top of the cake before serving. Keep refrigerated.


Leave a Reply