
Introduction to Black Forest Cookies
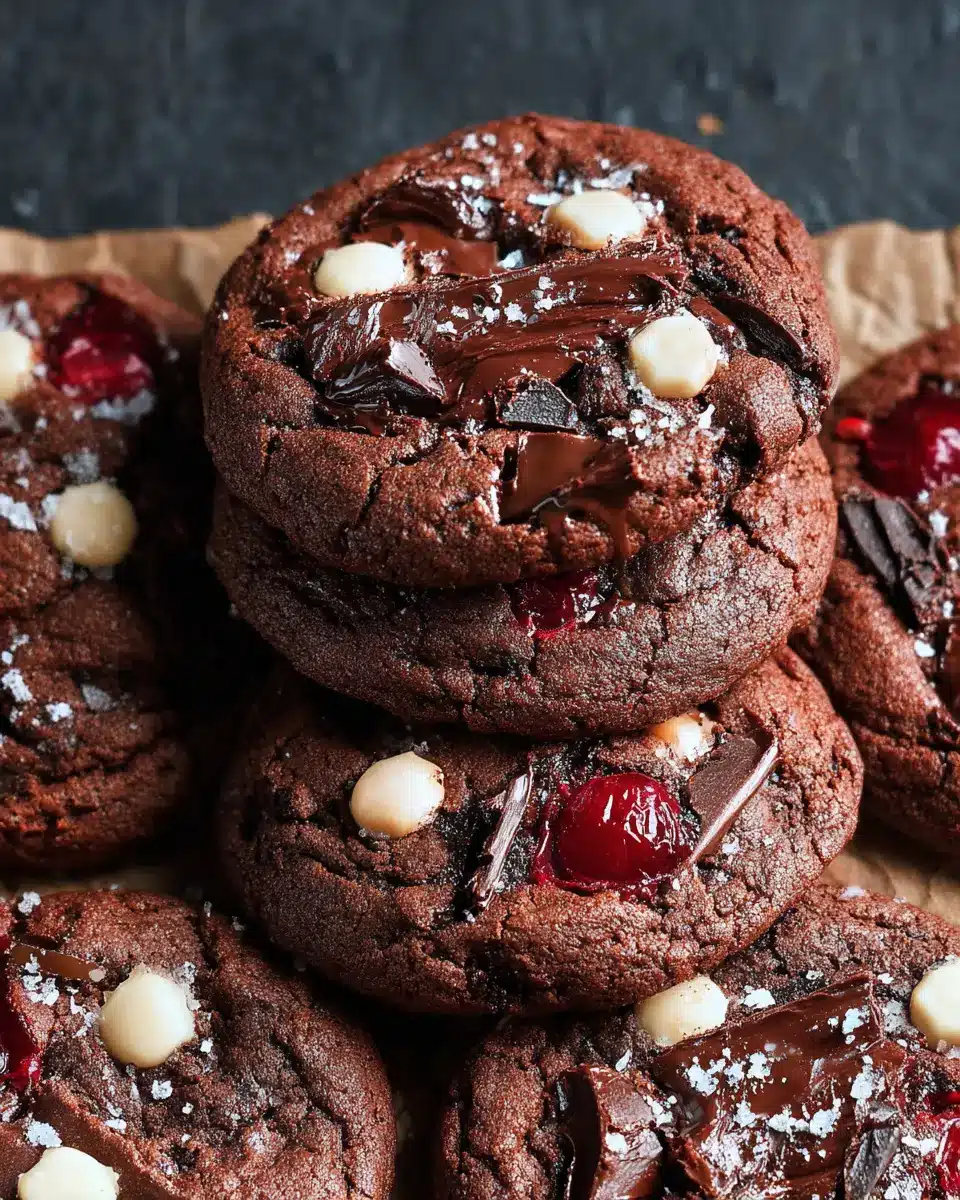
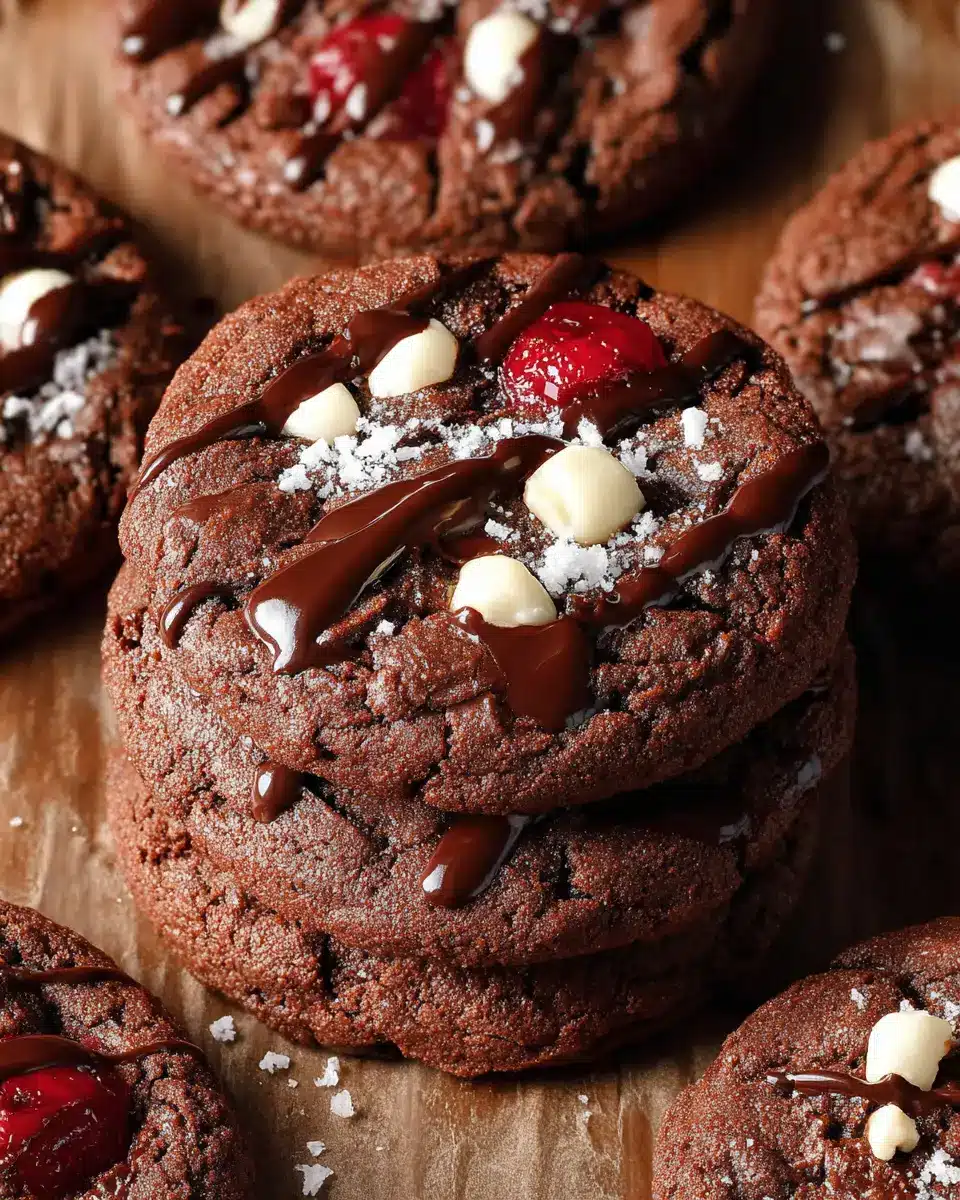
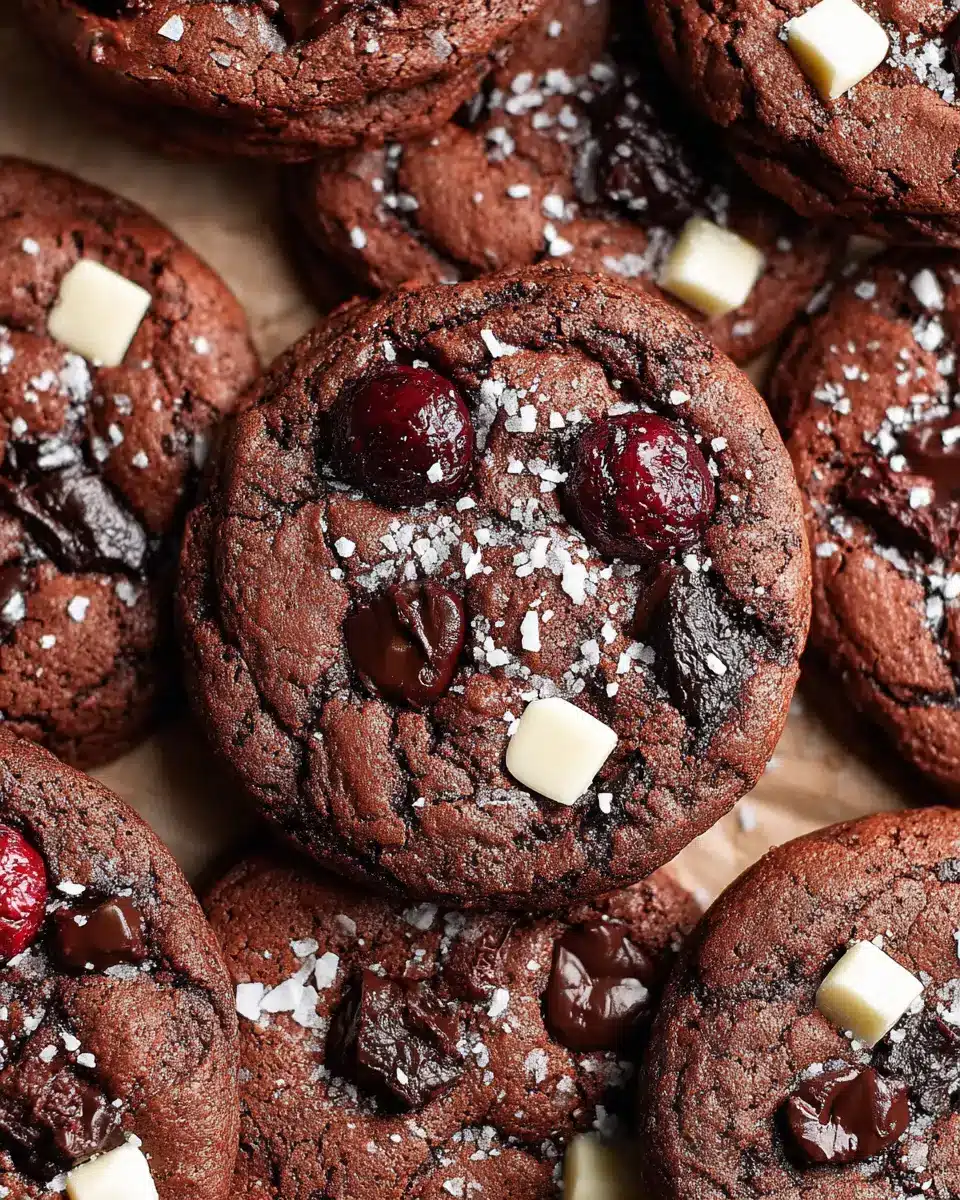
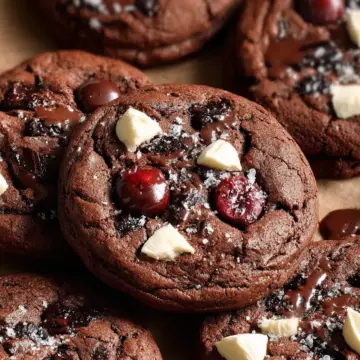
If you’ve ever craved the decadent flavors of a classic Black Forest cake, you’re in for a treat with Black Forest Cookies! These delightful baked goods capture the essence of the beloved dessert in a portable, cookie format. Think rich chocolate, tangy cherries, and creamy accents all packed into one chewy bite.
Why are Black Forest Cookies a must-try?
Black Forest Cookies are a must-try for anyone who enjoys a balance of flavors and textures. The combination of dark chocolate and dried sour cherries not only satisfies your sweet tooth but also offers a hint of tartness that keeps your palate intrigued. Plus, the addition of white chocolate chunks delivers a creamy contrast that takes these cookies to the next leve.
Imagine biting into a warm cookie, the fudgy interior melting in your mouth while chunks of chocolate and cherries surprise you at every turn. It’s like having a slice of cake but in cookie form—perfect for sharing (or not). Whether for a cozy night in or a gathering with friends, these cookies are sure to impress.
Curious about how to whip up your own batch? Let's get started with the recipe!
Ingredients for Black Forest Cookies
Essential ingredients for the perfect batch
To create the ultimate Black Forest Cookies, you'll need a few key ingredients that work together to deliver that rich, decadent flavor profile. Here’s what you’ll need:
- Unsweetened chocolate
- Unsalted butter
- Honey
- Large eggs
- Pure vanilla extract
- Granulated sugar
- Salt
- All-purpose flour
- Cocoa powder
- Baking soda
- Dark and white chocolate chunks
- Dried sour cherries
The role of each component in flavor and texture
Each ingredient plays a vital role in shaping the flavor and texture of these cookies. For instance, the unsweetened chocolate and cocoa powder provide a deep, chocolatey base, while the butter adds that necessary richness. The sugar not only sweetens but also contributes to the chewy texture. The dried sour cherries bring a delightful tang that perfectly complements the sweetness, giving that iconic Black Forest flavor. Vanilla extract enhances overall depth, and a hint of baking soda helps achieve that ideal texture—soft and slightly gooey in the center.
Ready to bake? Trust me, this combination will lead you to cookie bliss!
Step-by-Step Preparation of Black Forest Cookies
Making Black Forest Cookies is a delightful journey, and I promise it’s easier than you might think! Follow these steps, and you’ll have soft, fudgy cookies that are sure to impress your friends and family.
Melt the chocolate and butter
Start by combining unsweetened chocolate (3 oz) and unsalted butter (7 tablespoons) along with 2 teaspoons of honey in a small saucepan. Place it over very low heat. Stir gently until everything melts together smoothly. Once melted, remove it from the heat and let it cool completely. This step is crucial for achieving that rich, indulgent flavor that makes these cookies genuinely special.
Whip the eggs and sugar to perfection
In a bowl of an electric stand mixer, crack in 2 large eggs at room temperature and add 1 teaspoon of pure vanilla extract. Beat them on medium speed for about 30 seconds, then gradually stream in 1 cup plus 2 tablespoons of granulated sugar. Increase the speed to high and whip for 3-5 minutes until the mixture becomes pale, thick, and nearly tripled in volume. It should fall back on itself in ribbons—this means you’re on the right track!
Blend the dry ingredients together
While your eggs and sugar are achieving that heavenly fluffiness, sift together 1 cup of all-purpose flour, 3 tablespoons of cocoa powder, and ¼ teaspoon of baking soda in a separate bowl. Whisk them together to ensure everything is well combined. This mixture is what will give your cookies a nice structure.
Combine the wet and dry mixtures
Once your chocolate mixture has cooled and your egg mixture is fluffy, it’s time to merge the two. Turn the mixer to low and slowly add the cooled chocolate mix until integrated. Then pour in the flour mix and stir gently on low until blended. Fold in ¾ cup of dark chocolate chunks and ½ cup of dried sour cherries. The combination of these flavors creates that classic Black Forest taste! Cover and chill this cookie dough in the fridge for just 15-20 minutes—too long, and it’ll get too firm; too little, and they won’t hold their shape.
Prepare the baking trays and scoop the dough
Preheat your oven to 350°F (175°C) and line two large baking trays with parchment paper. When your dough is ready, scoop generous 2-tablespoon portions of it onto your trays. Make sure to space them about 2 inches apart to allow room for spreading. For a neater appearance, you can roll them into smooth balls.
Bake to fudgy perfection
Place your trays in the oven and bake for 10-12 minutes. You want the cookies to be cracked on top yet still soft in the middle. They may look under-baked, but don’t worry—they’ll continue to set as they cool, leaving you with that coveted fudgy center. After a few minutes on the baking tray, transfer them to a wire rack to cool completely.
And there you have it! Follow these steps, and you'll be savoring scrumptious Black Forest Cookies in no time. Perfect for sharing or indulging just a little too much!
Variations on Black Forest Cookies
Experiment with Different Chocolate Types
Elevate your Black Forest Cookies by mixing in various types of chocolate! Try using milk chocolate or even an intense dark chocolate for a richer flavor profile. Each chocolate type will impart a unique sweetness and depth, making your cookies a versatile treat for any occasion.
Add Your Favorite Dried Fruits or Nuts
Don’t hesitate to get creative! Add your favorite dried fruits like cranberries or apricots to complement the sour cherries. Nuts such as walnuts or pecans can add a delightful crunch, enhancing both the texture and flavor. Customizing your Black Forest Cookies ensures they are uniquely yours and packed with ingredients you love!
Cooking Tips and Notes for Black Forest Cookies
Common Mistakes to Avoid
When making Black Forest Cookies, consistency is key. Avoid overmixing once you add the flour mixture—this can lead to tough cookies. Also, remember that if your cookies look slightly under-baked when you take them out, that's perfectly fine! They will continue to set as they cool, achieving that delightful fudgy center.
How to Store Cookies for Freshness
To keep your Black Forest Cookies fresh, store them in an airtight container at room temperature for up to a week. For longer storage, you can freeze the cookies in a single layer on a baking sheet, then transfer them to a zip-top bag once frozen. This way, you can enjoy their rich chocolatey flavor anytime. Check out storage tips on sites like Taste of Home for more ideas.
These simple tips can make a big difference in your cookie-baking experience, so happy baking!
Serving Suggestions for Black Forest Cookies
Pairing Cookies with Beverages
When it comes to enjoying your delightful black forest cookies, beverages play a vital role in enhancing the experience. For a cozy afternoon treat, consider pairing your cookies with rich, aromatic coffee. A smooth espresso or a creamy latte beautifully complements the chocolate and cherry flavors. If you're in the mood for something cooler, a glass of chilled milk or even a fruity cherry soda can offer a refreshing contrast that elevates every bite.
Creative Ways to Present Your Baked Goods
Presentation is everything! Why not display your black forest cookies on a beautiful platter lined with parchment paper for a rustic feel? You could even stack them in a glass jar for a charming, homey touch. Add a sprig of fresh mint or edible flowers for a pop of color. These simple enhancements not only make your cookies look tempting but also invite your guests to dive in!
For more dessert presentation ideas, check out this helpful guide on food styling.
Time Breakdown for Making Black Forest Cookies
Preparation time
Getting started on your black forest cookies requires about 20 minutes. This includes melting the chocolate, mixing your batter, and chilling the dough—a crucial step for the perfect texture.
Baking time
Once you've prepped everything, your cookies will bake for approximately 10-12 minutes. Keep an eye on them towards the end; you want a soft center!
Total time
From start to finish, you're looking at around 30-35 minutes to have those delectable black forest cookies ready to delight your taste buds. Enjoy every crumb!
Nutritional Facts for Black Forest Cookies
Calories per cookie
Each delightful black forest cookie contains approximately 150 calories. This makes them a satisfying treat without being overly indulgent—perfect for a midday pick-me-up!
Key nutrients
These cookies pack in some nutrition as well! Each cookie provides a good source of fiber from the dried sour cherries, along with essential minerals and antioxidants from dark chocolate. They’re also a decent source of healthy fats due to the butter and chocolate.
Sugar content
Each cookie contains about 10 grams of sugar. While it’s essential to keep sugar intake in check, the sweetness comes from natural sources like honey and granulated sugar—so you can enjoy a balanced treat when you're craving something delicious!
For more insights on black forest cookies and other fun recipes, check out this article for healthy baking options and ingredient swaps!
FAQs about Black Forest Cookies
How do I know when my cookies are done?
Figuring out the perfect timing for your Black Forest cookies can be a game-changer! They should have a slightly cracked top, looking set at the surface, but remain soft in the center. To be precise, aim for 10-12 minutes in a preheated oven at 350°F. Remember, they’ll continue to cook a bit while cooling on the baking sheet, ensuring that delicious fudgy texture you crave.
Can I use substitute ingredients?
Absolutely! The magic of Black Forest cookies lies in their flexibility. If you're out of unsweetened chocolate, try using cocoa powder—or another chocolate variety—for a different flavor profile. Have a nut allergy? Feel free to swap out the chocolate chunks with your favorite seeds or fruit. Don’t hesitate to get creative!
How long will these cookies last?
These delectable cookies can stay fresh for up to a week when stored in an airtight container at room temperature. To maintain their delightful fudginess, consider refrigerating them for even longer shelf life. Who knows, they might even taste better after a day or two as the flavors meld! Want to store them for future cravings? They can also be frozen for up to three months—just remember to thaw them properly to enjoy their full glory!
Conclusion on Black Forest Cookies
Making black forest cookies at home is a delightful experience that'll leave your kitchen smelling heavenly. With rich chocolate flavor and bursts of cherry, these cookies are perfect for sharing or indulging. Plus, they're easy to whip up whenever a sweet craving strikes. Dive into baking these goodies today!
Why You'll Love Making These Cookies at Home
Creating your own black forest cookies means you can control the quality of the ingredients while customizing them to your taste. Imagine the satisfaction of pulling freshly baked cookies from your oven, their gooey centers tempting everyone around.
Consider the following perks:
- Freshness: Enjoy cookies that are warm and straight from your oven.
- Quality Control: Use premium chocolate and organic cherries for a gourmet touch.
- Creative Freedom: Experiment with flavors and textures to make each batch unique.
Not to mention, making cookies at home can be a wonderful way to bond with friends or family—whether baking together or over a plate of treats! For more baking inspiration, check out sites like King Arthur Baking or Serious Eats.
So why wait? Gather your ingredients, crank up the oven, and treat yourself to these delicious black forest cookies.
Black Forest Cookies
Equipment
- Electric stand mixer
- small saucepan
- Baking trays
- Parchment paper
Ingredients
Chocolate Base
- 3 oz unsweetened chocolate, coarsely chopped
- 7 tablespoon unsalted butter
- 2 teaspoon honey
Wet Ingredients
- 2 large eggs at room temperature
- 1 teaspoon pure vanilla extract
Dry Ingredients
- 1 cup granulated sugar
- 2 tablespoon granulated sugar
- ½ teaspoon salt
- 1 cup all-purpose flour
- 3 tablespoon cocoa powder
- ¼ teaspoon baking soda
Chocolate Chunks and Cherries
- ¾ cup dark chocolate chunks
- ½ cup white chocolate chunks
- ½ cup dried sour cherries, coarsely chopped
Instructions
Preparation
- Combine unsweetened chocolate, butter and honey in a small saucepan and stir over very low heat until melted and smooth. Set aside to cool completely.
- Place eggs and vanilla in the bowl of an electric stand mixer fitted with the paddle attachment and beat on medium speed for about 30 seconds. Gradually stream in sugar and then beat on high speed for 3-5 minutes, until pale, thick and almost tripled in volume. Mix in salt.
- Sift flour, cocoa powder and baking soda into a medium bowl and whisk to blend evenly.
- Turn mixer to low speed and slowly add cooled melted chocolate mixture. Mix until evenly combined. Add flour mixture and mix on low until blended, then fold in chocolate chunks and dried cherries. Cover the bowl and place it in the fridge and chill for just 15-20 minutes.
- Preheat your oven to 350°F and line two large baking trays with parchment paper.
- When the mixture is thick and fudge-like, scoop or spoon generous 2-tablespoon portions of dough onto prepared baking trays, spacing them 2 inches apart. Or, for a smoother look, roll dough into smooth balls.
- Bake for 10-12 minutes, until cracked and set at the surface but significantly soft in the middle. Transfer baking trays to a wire rack and let cookies set for a few minutes before transferring individually to the rack to continue cooling.

Leave a Reply