
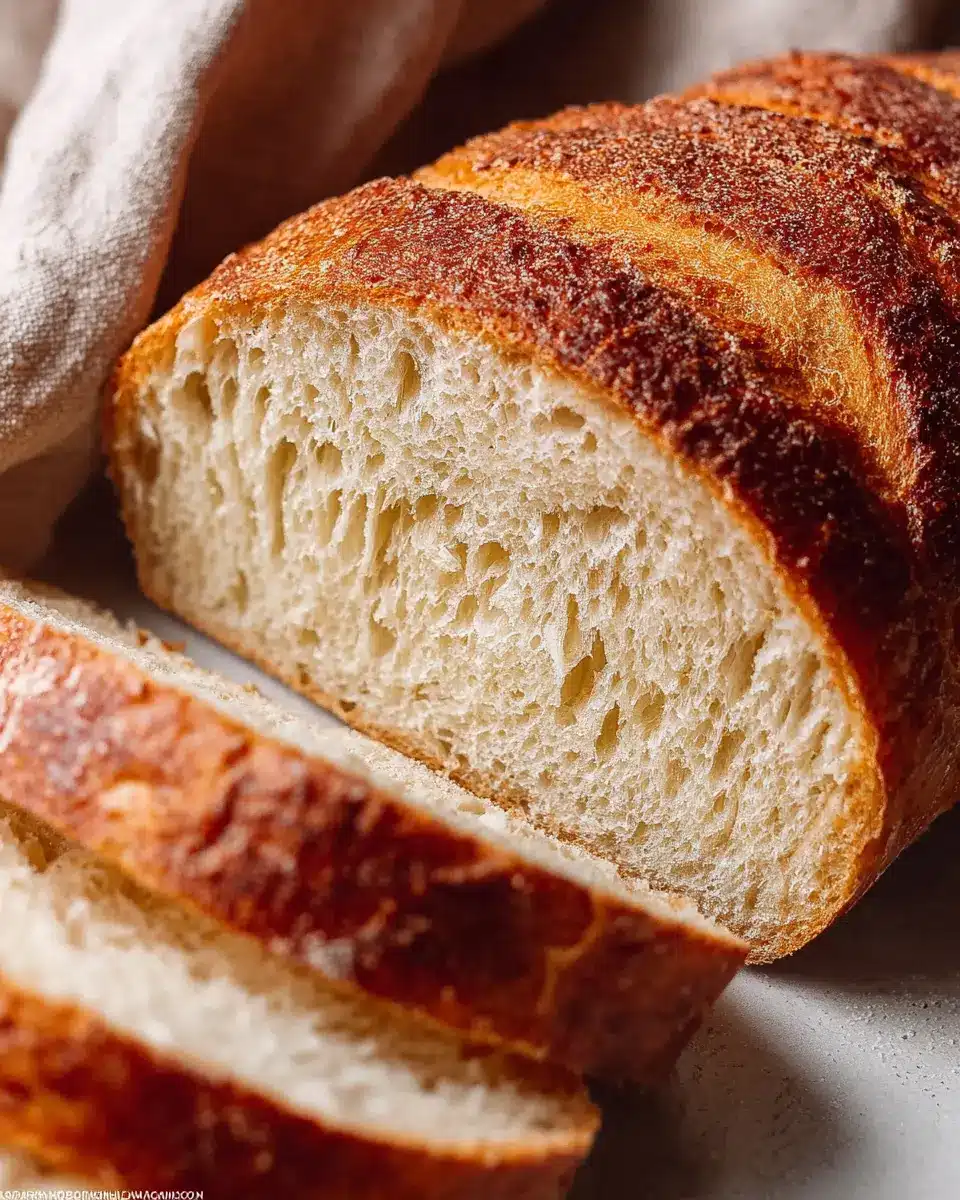
Introduction to Gluten Free White Bread
When it comes to eating healthily, gluten free bread has become a popular choice for many. Whether due to celiac disease, gluten sensitivity, or simply a desire for a lighter option, gluten-free diets have garnered significant attention. But why should you explore gluten free white bread specifically?
Many traditional bread options are packed with gluten, which can cause discomfort for some people. In addition, gluten free breads can be a delightful addition to your meals, offering a different flavor and texture without the bloating or stomach issues. The great news is that gluten free white bread can be deliciously soft and fluffy, perfect for sandwiches or toast.
With advancements in gluten-free baking methods, you can whip up a loaf that rivals even the best traditional breads. Ingredients like tapioca starch, sorghum flour, and psyllium husk create a delightful texture while keeping your bread light and airy. Plus, the aroma that fills your kitchen as it bakes is simply unbeatable.
Curious to try making your own? Let’s dive into this gluten free white bread recipe that’s both simple and satisfying!
For additional reading on gluten-free diets, check out Celiac Disease Foundation for valuable resources.
Ingredients for Gluten Free White Bread
Essential Ingredients Explained
Creating delicious gluten free white bread begins with a few essential ingredients that contribute to its texture and flavor. Here’s a rundown:
- Psyllium Husk: This acts as a binding agent, giving the bread elasticity and preventing it from crumbling.
- Tapioca Starch: Provides chewiness and a subtle sweetness.
- Millet Flour: This gluten-free flour helps with texture and flavor, giving the bread a nice lightness.
- Sorghum Flour: It adds a slight sweetness and a nutritious boost.
- Instant Yeast: For that perfect rise, ensuring your bread is fluffy rather than dense.
- Olive Oil and Apple Cider Vinegar: They help with moisture and flavor while contributing to the overall structure.
Alternative Options for Each Ingredient
Not all ingredients are set in stone—here are some excellent alternatives:
- Psyllium Husk Powder: You can lower the amount if you're using the powder form.
- Cornstarch, Potato Starch, or Arrowroot Starch: These can successfully replace tapioca starch.
- Brown Rice Flour: If millet flour isn't available, it can be a great swap in equal amounts.
- Light Buckwheat Flour or Oat Flour: Sorghum flour can be substituted with these if you're not sensitive to oats.
- Active Dry Yeast: If you don’t have instant yeast, use active dry yeast with some activation time.
By being flexible with these ingredients, you can still achieve a wonderful loaf of gluten free white bread that's perfect for any occasion. For more tips on baking, check out resources like King Arthur Baking or Gluten Free Girl.
Preparing Gluten Free White Bread
Making gluten free white bread at home is not only achievable but also incredibly rewarding. With the right ingredients and a few simple steps, you can create a loaf that's delicious and satisfying. Let’s walk through the process together!
Make the psyllium gel
Start by creating a psyllium gel, which is essential for giving your gluten-free bread the right texture. In a mixing bowl, combine 20g (4 tbsp) of psyllium husk with 360g (1½ cups) of lukewarm water. Stir the mixture, and in about 30-45 seconds, you’ll notice it thickening into a gel-like consistency. This unique binding agent plays a crucial role in mimicking the elasticity normally provided by gluten.
Mix the dry ingredients
Next, grab a large bowl or the bowl of a stand mixer if you’re using one. Whisk together the following dry ingredients:
- 145g (1¼ cups) tapioca starch
- 145g (1 cup + 1 tbsp) millet flour (or brown rice flour)
- 50g (⅓ cup + 1 tbsp) sorghum flour (or buckwheat flour)
- 15g (1 tbsp) caster sugar
- 8g (1½ tsp) salt
- 6g (2 tsp) instant yeast
By ensuring that all your dry ingredients are mixed evenly, you’re setting yourself up for a well-balanced loaf.
Combine wet and dry ingredients
Create a well in the center of your dry mixture and add your psyllium gel, 15g (1 tbsp) of olive oil, and 8g (1½ tsp) of apple cider vinegar. If you used active dry yeast, make sure to activate it first. Pour in any pre-prepared yeast mixture now. Mix everything together until you form a cohesive dough.
Knead the dough
This is where the fun begins! Knead the dough for a few minutes until it's smooth and well incorporated. If you’re using a stand mixer, the dough should pull away from the sides without much stickiness. Remember, resist the urge to add more flour; too much will lead to a dense loaf.
Shape and proof the loaf
Lightly flour your work surface and turn out the dough. Roll it into a rough rectangle (about 11 x 7 inches). Starting from the wide end, roll the dough up into a log, pinching the seam together as you go. Transfer the shaped dough, seam side down, onto a parchment-lined baking sheet. Cover it lightly with plastic wrap and let it proof in a warm area until it doubles in size—this usually takes about an hour.
For great tips on keeping your proofing environment warm, check out The Kitchn.
Bake the loaf
Preheat your oven to 425ºF (220ºC) while the loaf proofs. Once puffed, brush the top with whisked egg white and score the loaf with a knife. Bake it with steam (don’t forget the ice cubes) for the first 15 minutes, then reduce the temperature to 400ºF (200ºC) and bake for an additional 25-30 minutes. To check for doneness, look for a golden brown crust.
Once baked, cool it on a wire rack until it reaches at least lukewarm. This crucial step ensures your bread maintains a lovely crumb. You might be tempted to slice it hot, but patience will reward you with a better texture!
By following these steps, you’ll have perfectly homemade gluten free white bread to enjoy with your favorite spreads or sandwiches. Happy baking!
Variations on Gluten Free White Bread
Seeded Gluten Free Bread
For a delicious twist on your gluten free white bread, try adding seeds! Incorporate a mix of sunflower, pumpkin, and sesame seeds into the dough for a nutritional boost and delightful crunch. Simply fold in about 100g of your desired seeds when combining the dry ingredients. This variation not only enhances the flavor but also adds texture, making each slice an adventure.
Herb-Infused Gluten Free Bread
If you’re looking to elevate the taste of your bread, consider infusing it with fresh or dried herbs. Adding a tablespoon of rosemary, thyme, or oregano will give your gluten free white bread a fragrant aroma that complements any meal. Just mix the herbs into the dry ingredients, and watch your ordinary loaf transform into a flavorful masterpiece!
These simple variations maximize creativity while ensuring your gluten-free experience remains enjoyable. You can find more tips on customizing bread recipes on King Arthur Baking. Enjoy baking!
Baking Notes for Gluten Free White Bread
Common Pitfalls to Avoid
When baking your gluten free white bread, the smallest misstep can lead to disappointing results. Here are some common pitfalls you should sidestep:
- Adding Extra Flour: It might be tempting to add more flour if the dough feels too wet. Resist! Extra flour can result in dense, dry bread. Trust the recipe for the right consistency.
- Skipping the Proof: Don’t rush the proofing time. This step is crucial for achieving a light, airy texture. If your kitchen is chilly, consider warming it slightly to encourage better rising.
Tips for Improved Texture
For a loaf with the perfect crumb, these tips work wonders:
- Use Fresh Ingredients: Make sure your instant yeast is fresh; expired yeast can hinder rising and affect texture. Check the packaging date to ensure efficacy!
- Psyllium Gel: Create a good psyllium gel; this is essential for moisture retention and structure in gluten-free baking. The right consistency will help achieve that desired elasticity.
- Practice Patience: Once baked, allow the loaf to cool completely before slicing. Cutting into hot bread can lead to a gummy texture rather than the light, fluffy bread you crave.
For more guidance on gluten-free baking, consider checking out America's Test Kitchen for expert insights. Happy baking!
Serving suggestions for Gluten Free White Bread
Pairing ideas
Finding the perfect accompaniments for gluten free white bread can elevate your meals. Consider pairing it with:
- Soups: A hearty tomato basil or creamy mushroom soup complements the soft texture.
- Salads: Serve slices alongside a vibrant quinoa salad or a simple green mix with lemon vinaigrette for a refreshing lunch.
- Spreads: Top with hummus, avocado, or nut butter for a satisfying snack.
Making sandwiches and toasts
Your gluten free white bread is ideal for sandwiches and toasts. Imagine a classic turkey bacon sandwich layered with crisp lettuce and ripe tomato, or a delicious chicken ham melt with gooey cheese—heavenly! For breakfast, try toasting slices and smearing with smashed avocado and a sprinkle of chili flakes. Versatility is key, so get creative with your toppings! Need more ideas? Check out this guide on sandwich crafting.
Tips for Making Perfect Gluten Free White Bread
Best Practices for Gluten Free Baking
When it comes to baking gluten free white bread, follow these tips to ensure optimal results:
- Measure Accurately: Use a kitchen scale for exact ingredient measurements, especially when using flour blends.
- Psyllium Husk Importance: Incorporate psyllium husk or powder properly to maintain the bread’s moisture and texture.
- Avoid Overmixing: Mix just until smooth to prevent a dense loaf.
- Warm Proofing: Allow the dough to rise in a warm area, essential for activating the yeast and achieving a nice rise.
Storage Tips for Freshness
Keep your gluten free white bread fresh and delicious:
- Cool Completely: Ensure the bread cools on a wire rack before storage to prevent moisture build-up.
- Use a Bread Box: Store in a bread box or paper bag for up to 3-4 days.
- Freezing for Longevity: For longer storage, wrap tightly in plastic wrap and freeze. When ready to eat, toast slices directly from the freezer for a fresher taste.
For more on gluten-free baking techniques, check out Gluten Free Baking Academy.
Time details for Gluten Free White Bread
Preparation time
This delightful gluten free white bread takes about 15 minutes to prep and mix the ingredients. Time to roll up your sleeves!
Baking time
Once your bread dough has risen beautifully, it’ll need about 40-45 minutes in the oven to achieve that perfect crust.
Total time
In total, you’re looking at around 2 hours from start to finish, including preparation, proofing, and baking. Perfect for a lazy weekend project or whenever you're craving fresh bread!
If you’re curious about the science behind gluten-free baking or want to check out more gluten-free recipes, here’s a great resource on gluten-free baking techniques. Enjoy your baking journey!
Nutritional Information for Gluten Free White Bread
Understanding the nutritional breakdown of your gluten free white bread is key to enjoying it as part of a balanced diet. Here’s a friendly snapshot of what this delicious bread offers:
Calories
A single slice of gluten free white bread contains approximately 120-130 calories, making it a satisfying addition to your meals without overdoing it.
Protein
Each slice provides around 2-3 grams of protein, which is essential for muscle repair and keeping you feeling satiated throughout the day.
Dietary Fiber
With about 1-2 grams of dietary fiber per slice, this bread supports healthy digestion while helping you feel fuller for longer.
For more guidance on building balanced meals, check out resources from the Academy of Nutrition and Dietetics. Snack smartly, and enjoy your gluten free white bread with toppings like avocado or turkey bacon for a nutritious upgrade!
FAQs about Gluten Free White Bread
Can I freeze gluten free bread?
Absolutely! Freezing gluten free white bread is a fantastic way to preserve its freshness. Simply slice the bread before freezing, so you can easily grab a piece when you need it. Wrap the slices tightly in plastic wrap or store them in an airtight container to prevent freezer burn. It can last up to three months in the freezer. To enjoy, just toast your slices directly from frozen, or let them thaw on the counter.
How do I know when the bread is done?
The best indicators of a perfectly baked gluten free white bread include a golden crust and a hollow sound when you tap the bottom. Another method is to weigh the loaf; it should weigh between 675-695g when done. This ensures the moisture has evaporated properly, leaving you with a light, fluffy texture.
What can I use instead of psyllium husk?
If you don’t have psyllium husk on hand, you can use ground flaxseeds or chia seeds as alternatives. Both work well to bind ingredients and provide similar textures. However, you’ll need to adjust the quantity; typically, 1 tablespoon of ground flax or chia mixed with 2.5 tablespoons of water will replace about 1 tablespoon of psyllium husk. For a detailed resource on gluten free substitutes, check out this comprehensive guide on gluten-free baking.
Feel free to reach out with any more questions or tips on your baking journey!
Conclusion on Gluten Free White Bread
Making gluten free white bread at home is a rewarding experience that offers great taste and texture. By following this simple recipe, you can enjoy fresh, homemade bread tailored to your dietary needs. Whether you’re crafting sandwiches or simply savoring a slice with butter, this bread unlocks delicious possibilities! For storage tips and variations, explore more on gluten-free baking techniques.
Gluten Free White Bread
Equipment
- stand mixer
- Baking sheet
- Parchment paper
- mixing bowls
Ingredients
Psyllium Gel
- 20 g whole psyllium husk Use 17g if using psyllium husk powder.
- 360 g lukewarm water
Flours
- 145 g tapioca starch Can substitute with cornstarch, potato starch or arrowroot starch.
- 145 g millet flour Can substitute with brown rice flour.
- 50 g sorghum flour Can substitute with light buckwheat flour or white teff flour.
Other Ingredients
- 15 g caster/superfine or granulated sugar
- 8 g salt
- 6 g instant yeast Use 8g if using active dry yeast.
- 15 g olive oil
- 8 g apple cider vinegar
- 1 US large/UK medium egg white Whisked, for brushing the bread before baking.
Instructions
Making the dough
- Prepare the psyllium gel by mixing the psyllium husk and lukewarm water in a bowl.
- In a separate bowl, whisk together tapioca starch, millet flour, sorghum flour, sugar, salt, and instant yeast.
- Create a well in the dry ingredients and add the psyllium gel, olive oil, and apple cider vinegar.
- Knead the dough until smooth and all ingredients are incorporated.
Shaping & Proofing the loaf
- Turn the dough onto a lightly floured surface, roll it out into a rectangle, and shape it into a log. Pinch the seam to seal.
- Place the dough on a baking sheet lined with parchment paper, cover with plastic wrap, and proof in a warm spot for about 1 hour.
Baking the loaf
- Preheat the oven to 425ºF (220ºC) and prepare a cast iron skillet on the bottom.
- Once proofed, brush the loaf with whisked egg white and score with 5-7 diagonal slashes.
- Bake in the oven for 15 minutes, then reduce temperature to 400ºF (200ºC) and continue for another 25-30 minutes.
- Cool the bread on a wire rack until at least lukewarm before slicing.


Leave a Reply