
Introduction to Sheet Pan Garlic Breadsticks
When life gets busy, the last thing you want to be is stressed about dinner. That's where sheet pan garlic breadsticks come in. This simple, delicious recipe not only offers a satisfying side dish but also serves as a quick snack or an appetizer that’s sure to impress. With just a few ingredients and minimal hands-on time, you can whip up a batch of fluffy, garlicky goodness right from your kitchen.
Why Sheet Pan Garlic Breadsticks Are a Game-Changer for Young Professionals
For young professionals juggling work, social commitments, and personal projects, convenience often reigns supreme. These sheet pan garlic breadsticks tick all the right boxes. They’re easy to prepare, require minimal clean-up, and are versatile enough to pair with almost any meal. Imagine coming home after a long day and having the aroma of freshly baked breadsticks wafting through your kitchen—as comforting as a hug after a tough day.
Not only are they quick to make, but they also allow for personalization! Want to experiment with toppings or herbs? Go right ahead! The possibilities are endless. Plus, they can be easily made to feed a crowd, making them perfect for gatherings or a cozy night in with friends. Discover how to make your own, and start enjoying delicious, homemade sheet pan garlic breadsticks today while freeing up time for what truly matters.
Ingredients for Sheet Pan Garlic Breadsticks
Creating delicious sheet pan garlic breadsticks is a straightforward journey, and it all starts with a few basic ingredients that you likely have on hand. Let's dive into what you'll need!
- Warm water (1 ½ cups): Just warm tap water works perfectly. This is essential for activating the yeast.
- Sugar (2 tablespoons): A small amount adds a hint of sweetness and helps feed the yeast for a better rise.
- Yeast (1 tablespoon): Instant or active dry yeast works. This is the magic ingredient that helps your dough rise.
- Salt (½ teaspoon): Enhances the flavor of your breadsticks.
- Flour (4 cups): All-purpose flour is ideal for that perfect texture.
- Butter (¼ cup): Melted butter adds richness and flavor. You’ll use some for the pan and some to brush on top.
- Parmesan cheese (¾ cup): Freshly grated adds a great savory kick.
- Garlic powder, dried oregano, and dried thyme: To taste! These optional seasonings lend fantastic flavor to the breadsticks.
Remember, the beauty of making sheet pan garlic breadsticks lies in how customizable they are. Feel free to play around with herbs and spices to make them your own! For further inspiration, check out sources like Serious Eats for additional tips on baking.
Preparing Sheet Pan Garlic Breadsticks
Making sheet pan garlic breadsticks is not only a delightful cooking experience but also a guaranteed crowd-pleaser. Whether for a family dinner or a cozy night in, this recipe will have everyone coming back for seconds. So, roll up your sleeves and let’s dive into the preparation process!
Activate the yeast
Start by activating the yeast, which is essential for giving your breadsticks that lovely rise. In the bowl of your stand mixer, combine 1½ cups of warm water with 2 tablespoons of sugar and 1 tablespoon of yeast. Gently mix them together, then let the mixture sit for about 5 minutes. You’ll know it’s working when you see bubbles forming on the surface. For a more in-depth understanding of yeast activation, check out this guide from King Arthur Baking.
Create the dough
Once your yeast is bubbly and alive, it’s time to make the dough. Add ½ teaspoon of salt and 4 cups of flour to the activated yeast and mix on high speed for about 5 minutes. The dough should start to come together nicely. Take a quick break to let it rest for another *5 minutes. This waiting period helps to develop the gluten, giving your breadsticks a wonderful chewy texture.
Prepare the baking sheet
While your dough is resting, melt ¼ cup of butter. Then, pour half of the melted butter into a large baking sheet (around 17" x 10" x 1"). Use a spatula to spread the butter evenly across the entire surface. This step not only helps prevent sticking but also adds flavor to the bottom of the breadsticks.
Shape the dough
After the dough has rested, place it in the center of the prepared baking sheet. Using your hands, stretch the dough out to the edges of the pan, which is easier than you might think! Once spread, pour the remaining melted butter on top, enhancing richness and moisture.
Add flavorings and cheese
Here comes the fun part—adding flavor! Sprinkle your favorite seasonings on top; I recommend a mix of garlic powder, dried oregano, and dried thyme. Feel free to get creative! Then, generously top everything with ¾ cup of Parmesan cheese for that irresistible cheesy goodness.
Bake the breadsticks
Preheat your oven to 170°F and place the sheet pan garlic breadsticks inside for about 8 minutes to help them rise. When they puff up (should be about an inch), increase the temperature to 350°F while keeping them in the oven. Bake for another 12-15 minutes or until they turn golden brown.
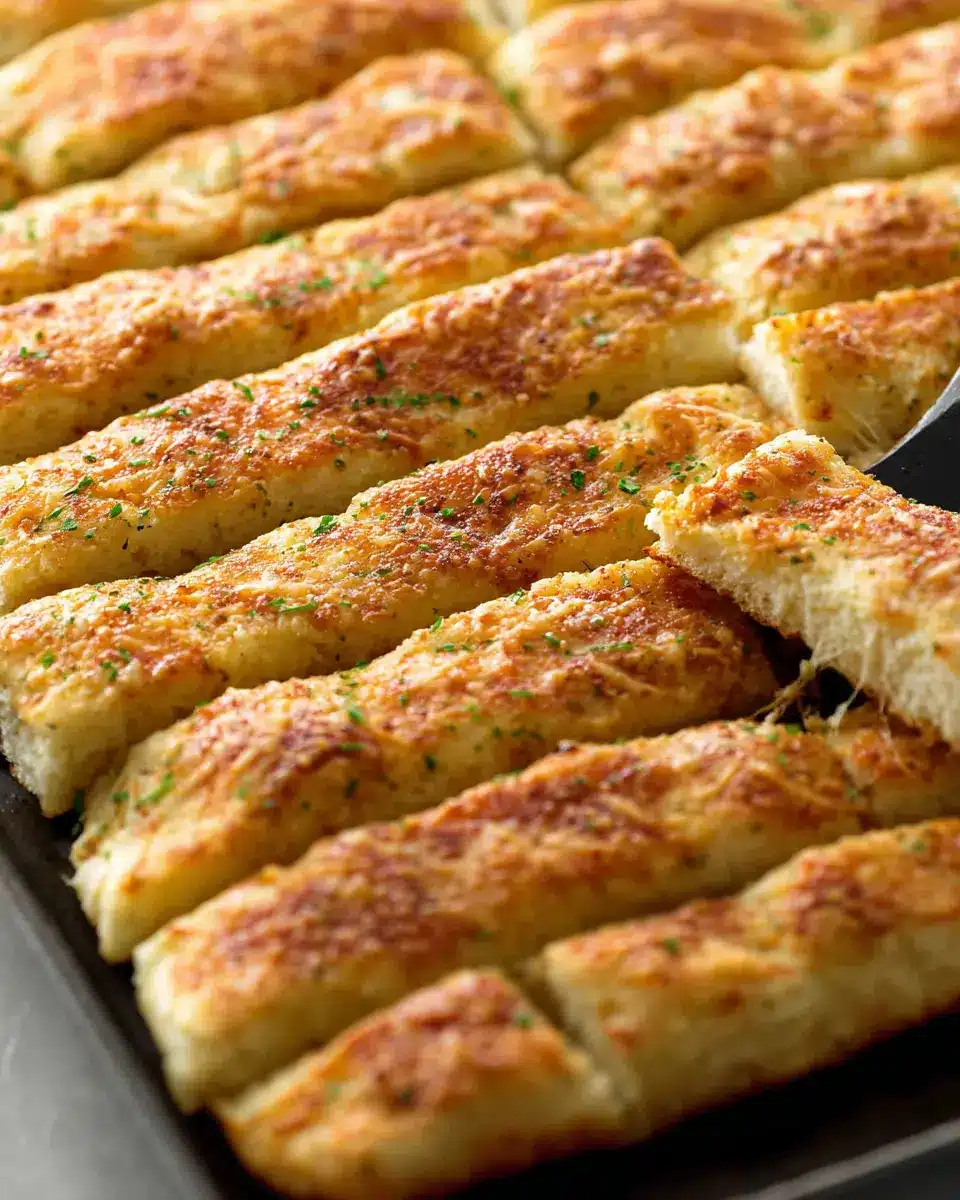
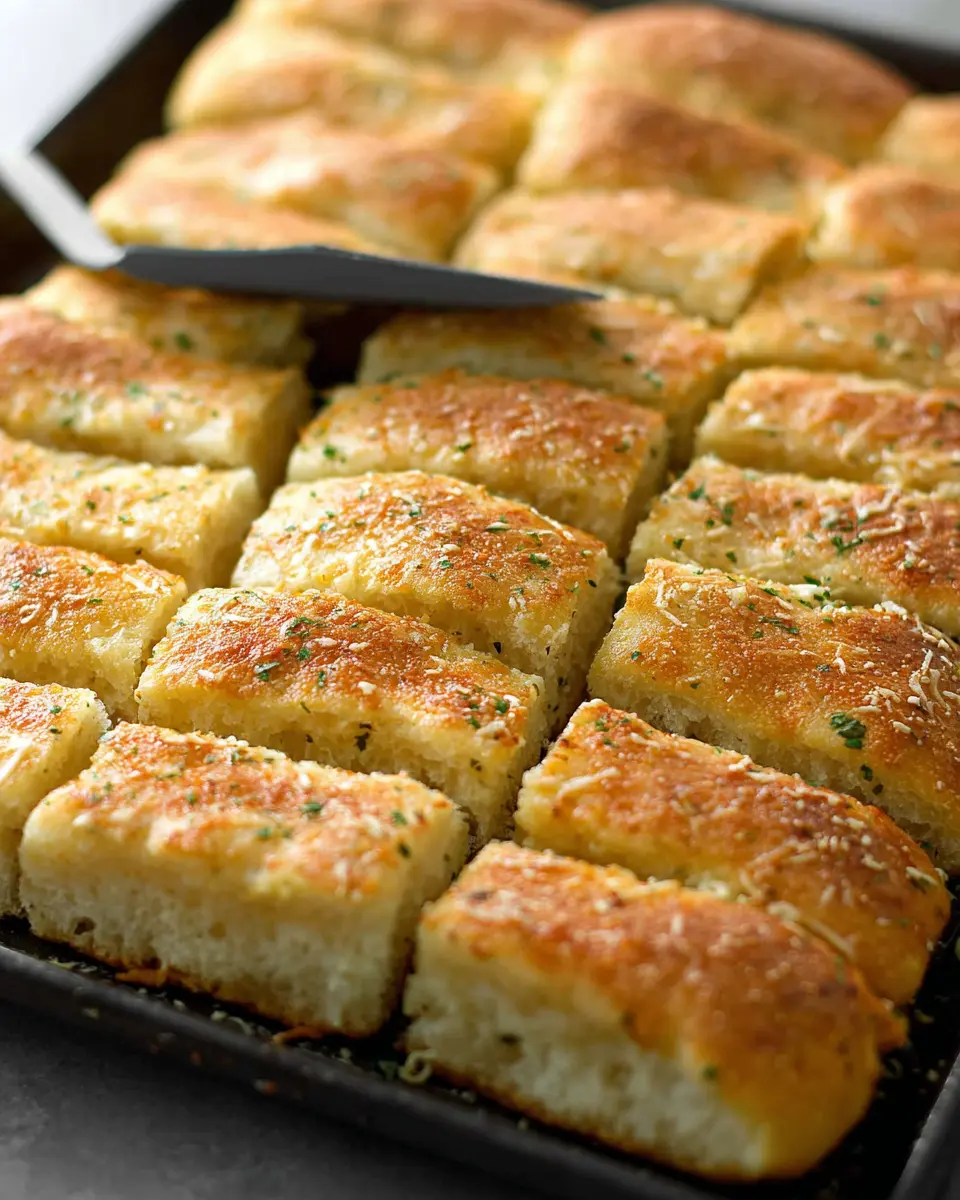
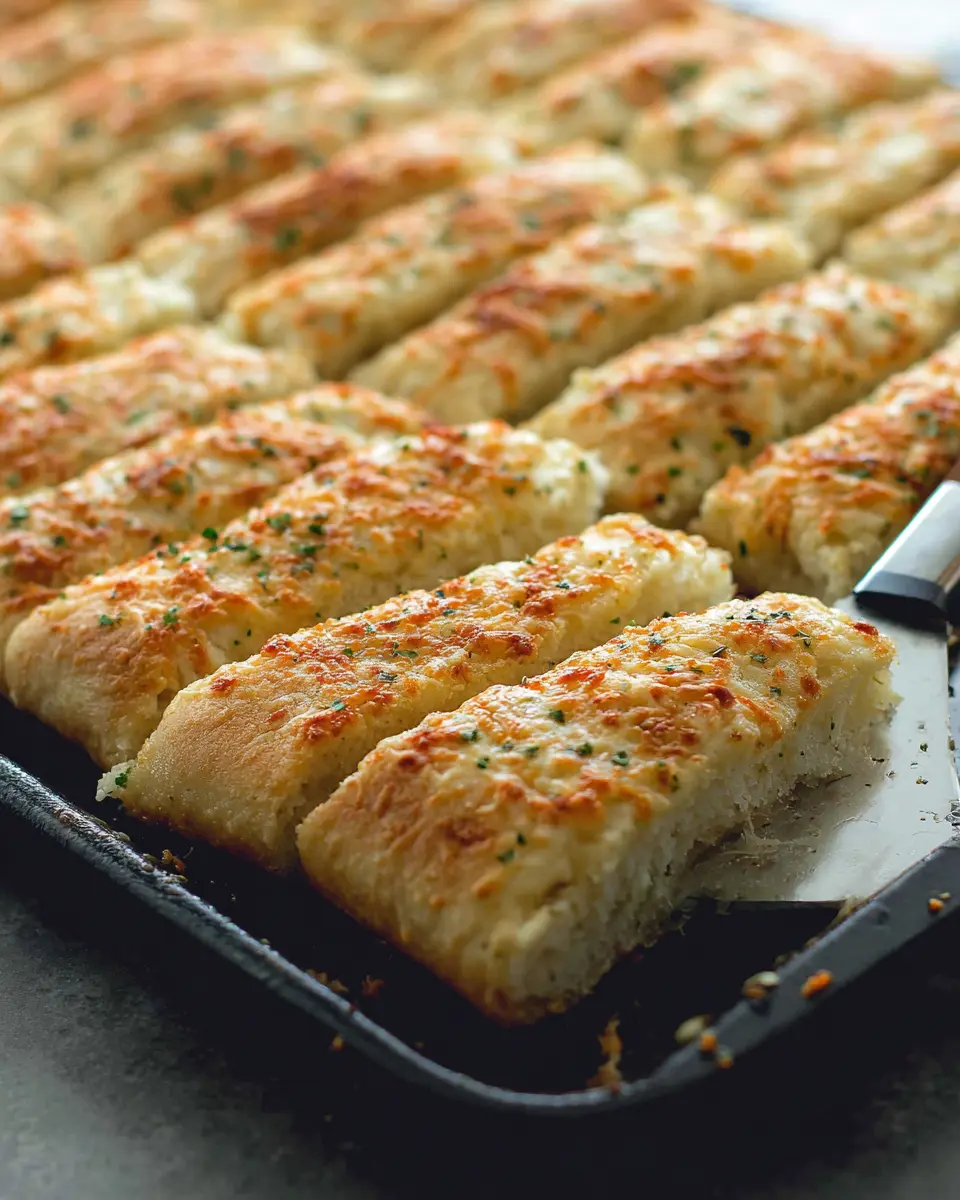
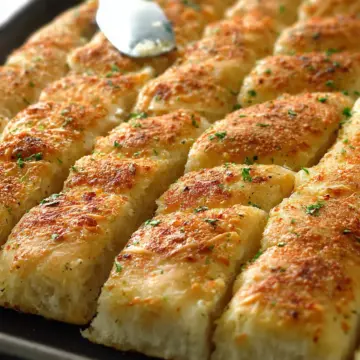
Cool and cut
Once baked to perfection, remove the pan from the oven and let the breadsticks cool for a few minutes. Use a pizza cutter to follow the indentations you made earlier to cut them into perfect sticks. It’s a simple, quick step that saves you from wrestling with the bread after it’s cooled completely!
And there you have it—your sheet pan garlic breadsticks are ready to enjoy! Serve them fresh out of the oven with marinara sauce or your favorite dip for a delectable treat that’s sure to impress. Happy baking!
Variations on Sheet Pan Garlic Breadsticks
Exploring variations of sheet pan garlic breadsticks can add an exciting twist to your bread game! Here are two delicious alternatives that are sure to impress.
Herb-infused Breadsticks
For a vibrant, aromatic version, sprinkle fresh or dried herbs over your dough before baking. A blend of basil, rosemary, and parsley pairs beautifully with the garlic flavor. Feel free to explore cooking with herbs by visiting sites like The Spruce Eats.
Cheese-stuffed Breadsticks
If you're a cheese lover, why not stuff your sheet pan garlic breadsticks? Roll the dough out, add mozzarella or cheddar cheese in the center, then fold over and seal before baking. You’ll have gooey, melty cheese in every bite that'll elevate your snack time!
Experiment with these variations and let me know which one becomes your new favorite!
Cooking Tips and Notes for Sheet Pan Garlic Breadsticks
Making delicious sheet pan garlic breadsticks is easier with a few handy tips! Here’s what you should know:
-
Water Temperature: Use warm tap water—just run it hot for a minute. If it's too cold, your dough won't rise well.
-
Butter Technique: To spread melted butter easily, a spatula works best. Consider pouring it evenly over the dough for extra flavor.
-
Adjust Seasonings: Experiment with different toppings! Fresh herbs, garlic powder, or even crushed red pepper flakes can elevate your breadsticks.
-
Cutting Method: After sprinkling cheese and seasonings, use a pizza cutter for clean cuts. If you encounter edges, kitchen scissors can help reach those stubborn spots.
For a fuller guide to the recipe, don't forget to check out the official cooking site!
Serving suggestions for Sheet Pan Garlic Breadsticks
Pairing Suggestions with Meals
Sheet pan garlic breadsticks are the perfect sidekick to a variety of meals! Think about serving them alongside:
- Pasta: Whether it’s a rich marinara, a creamy Alfredo, or a zesty pesto, these breadsticks elevate any pasta dish.
- Soups and Stews: Dip them in a hearty chicken noodle or a warming minestrone for an added layer of flavor.
- Salads: Pair them with a fresh garden salad or a Caesar salad to balance out the meal.
Make it a cozy weeknight dinner or a gathering with friends—either way, you’ll impress with these versatile breadsticks!
Serving with Dips
Why not take your sheet pan garlic breadsticks to the next level by serving them with your favorite dips? Here are a few ideas:
- Marinara Sauce: A classic pairing that never goes out of style.
- Creamy Spinach Dip: For a delightful twist, serve them alongside spinach dip loaded with flavors.
- Hummus: Explore different hummus varieties like roasted red pepper or garlic for a tasty treat.
These pairings not only complement the breadsticks but also leave your guests craving seconds!
Time Breakdown for Sheet Pan Garlic Breadsticks
Preparation Time
Get started by gathering your ingredients and equipment. You’ll need about 15 minutes to mix and prepare your dough.
Cooking Time
The baking itself takes approximately 20-25 minutes. This includes some time for the breadsticks to rise in the oven.
Total Time
From start to finish, expect to spend around 40 minutes creating these delicious sheet pan garlic breadsticks. Perfect for a weeknight dinner or a gathering with friends!
For more delicious sides, consider checking out BBC Good Food for additional recipe inspirations!
Nutritional Facts for Sheet Pan Garlic Breadsticks
Understanding the nutritional facts can help you enjoy your sheet pan garlic breadsticks in moderation. Here’s a quick overview:
Calories
Each breadstick contains approximately 148 calories. This makes them a delightful, flavorful addition to any meal without packing on too many extra calories.
Carbohydrates
With about 23 grams of carbohydrates per serving, these breadsticks provide a satisfying source of energy. They’re perfect for fueling your day!
Protein
These tasty treats also deliver around 5 grams of protein, making them a wonderful complement to your favorite meals or a snack to keep you energized.
For more insights on nutritional content, check resources like USDA FoodData Central for detailed information!
FAQs about Sheet Pan Garlic Breadsticks
Can I use gluten-free flour for these breadsticks?
Absolutely! If you're looking to make gluten-free sheet pan garlic breadsticks, substitute regular flour with a gluten-free all-purpose flour blend. Ensure the blend contains xanthan gum for better texture. While the flavor might have slight variations, you'll still get a delightful result!
How can I store leftover breadsticks?
To keep your leftover sheet pan garlic breadsticks fresh, allow them to cool completely, then store them in an airtight container at room temperature for up to 3 days. For longer storage, freeze them by wrapping each breadstick in aluminum foil and placing them in a freezer bag. They can last up to 3 months this way.
Can I make the dough ahead of time?
Yes, you can! Prepare the dough as directed, then cover it and refrigerate for up to 24 hours before baking. The next day, bring it to room temperature and continue with the recipe. This method enhances the flavors, allowing for even tastier breadsticks!
For further tips on bread dough preparation, check out resources like King Arthur Baking.
Conclusion on Sheet Pan Garlic Breadsticks
In summary, these sheet pan garlic breadsticks are a delightful and effortless addition to any meal. With their crispy edges and soft center, they pair wonderfully with pasta, soups, or just as a snack. Don't hesitate to customize your toppings and share this crowd-pleaser with friends! For more tips on baking, check out our Baking Basics Guide.
Sheet Pan Garlic Breadsticks
Equipment
- Mixer (Stand)
- Sheet Pan (Large)
- Pizza Cutter
Ingredients
- 1.5 cups warm water I just used warm tap water
- 2 Tablespoon sugar
- 1 Tablespoon yeast
- 0.5 teaspoon salt
- 4 cups flour
- 0.25 cup butter melted
- 0.75 cup Parmesan cheese shredded
- garlic powder to taste, optional seasoning topping
- dried oregano to taste, optional seasoning topping
- dried thyme to taste, optional seasoning topping
Instructions
- In the bottom of your mixer, mix together water, sugar, and yeast using your dough hook attachment. Let it rest for 5 minutes.
- Add in the salt and flour and mix until it's all incorporated. Mix on high speed for 5 minutes, then let dough sit and rest for 5 more minutes.
- Melt the butter and pour half into the bottom of a large baking sheet. Spread the butter around the entire pan using a spatula.
- Place the bread dough in the center of the pan and let it sit for a few minutes.
- Spread the dough out to the edges of the pan. Pour the rest of the melted butter on top of the breadsticks and spread evenly using a spatula.
- Sprinkle your favorite seasonings on top.
- Sprinkle your seasonings all over the butter, then top with some fresh shredded Parmesan.
- Using a pizza cutter, cut your dough into small breadsticks.
- Stick these breadsticks in a preheated oven at 170℉ and cook for about 8 minutes. Turn up your oven to 350℉ and bake breadsticks for 12-15 more minutes or until they start to turn golden.
- Remove from oven and let cool for a few minutes, then follow the indentations using a pizza cutter to cut the breadsticks.
Leave a Reply